Although the bike was running and idleling ok, I decided to rebuild the carbies anyway. After more then 10 years doing nothing, the seals and rubbers must have been dried out and it's just waiting for a disaster to happen when you don't replace them. Another factor that made me decide to rebuild them was the amount of dirt/rust I found in the petcock filter and the fact that I wanted to replace the hardened and dried out inlet and outlet boots anyway
So on a sunny Saturday morning I started this next chapter of the Honda CB500K1 rebuild. When you have pot filters on your bike it's pretty easy to take the carbies out but with the stock airbox still intalled on this bike it was a bit of a wrestle to get 'em out of the frame.
I disconnected the 2 trottle cables, loosened all the inlet - and outlet clamps and ended up pulling the airbox out of the way as far as possible with an okkie strap. This gave me just enough room to wiggle the bank of 4 Keihin carbies out of the frame. The carburetors used on the Honda CB500K1 are the 627B ones. You can find the carburetor number on top of the outlet flange.
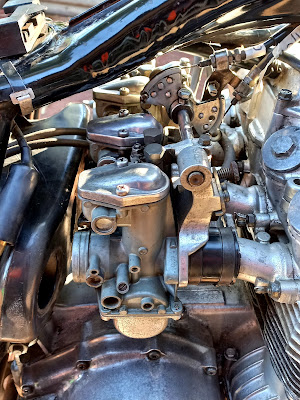 |
| Honda CB500K1 carburetors |
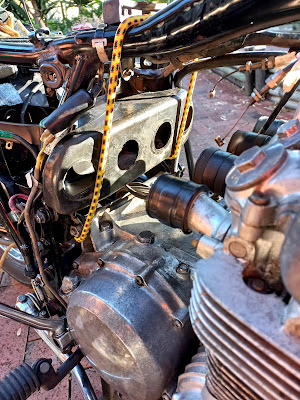 |
Honda CB500K1 air filter box
|
 |
| Honda CB500K1 carburetors 627B |
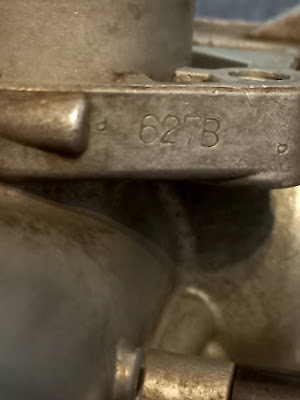 |
Honda CB500K1 carburettors 627B
|
After a general outside clean I loosened 8 big screws on the mounting bracket so I could separate the Keihin carburetors. After taking off the top cover/nut from the adjuster holder and taking out the small spring and "golf tee" (the part manual calls them spring seats), you can take the carbies off in two pairs. Right in the middle of the two pairs is the throttle return spring, the stay plate holds the top of the spring and a pin between carbie 2 and 3 holds the bottom of the spring. The pin will fall out when you separate the carbies so be careful. the two carbies are only connected through a 2.5 cm long vacuum hose, the synchronise plate and a T joint for the fuel supply. If the vacuum hose won't come off the brass inlet, just cut it in half as you're gonna renew it anyway. The T joint popped out fairly easy.
The synchronise link plate is a very thin piece of metal that connect the two adjuster holder screws. They can snap in half easily, especially when somebody tries to remove the top cover of the adjuster holder without keeping the synchronise link plate in position. Mine were both broken.
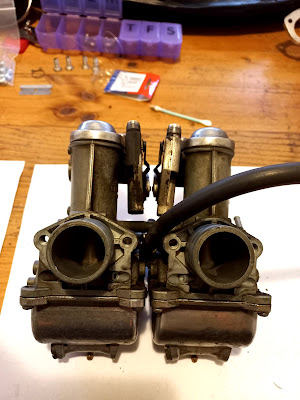 |
Honda CB500 K1 carbies
|
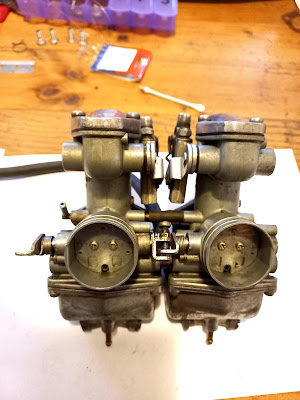 |
Honda CB500 K1 carbies intake side
|
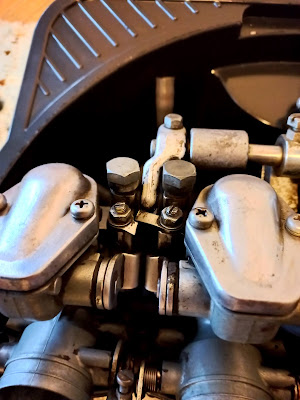 |
| Honda CB500 K1 carbies broken sync link |
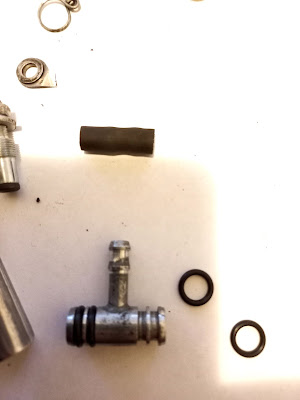 |
Honda CB500K1 T-joint fuel line with new O-rings
|
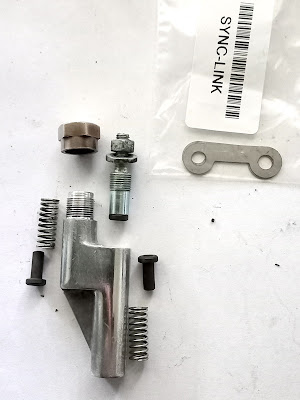 |
| Honda CB500 K1 Adjuster Holder parts |
When I took off the bowls I was surprised how clean they were. There was only a thin layer of dust/rust inside.
 |
Honda CB500 K1 carbie float bowl
|
I ordered 4 carburetor rebuild sets from 4into1.com, mainly to replace all the gaskets and seals. If the brass parts like the main jet, pilot jet, emulsion tube, air screw, needle and float valve aren't damaged or worn out I prefer to reuse them as they are original Keihin. But in case they are bad the rebuild set comes with all those bits as well. I also like the fact that the bowl gasket are pre-formed
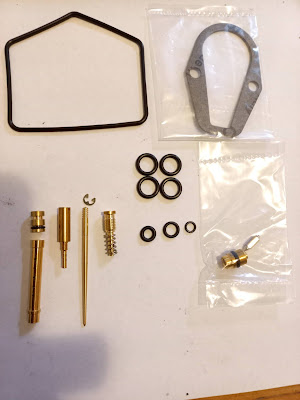 |
Honda CB500 K1 rebuild kit
|
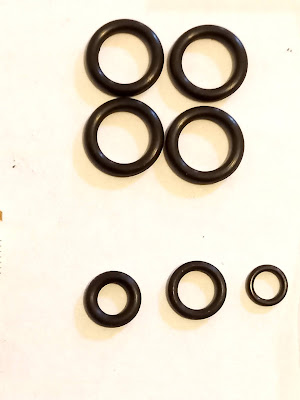 |
| Honda CB500 K1carburetor O-rings |
In case you're wondering what those O-rings are for:
- 4x big ones are for the Fuel T joint that connects the two carbies
- 1x very small one is for the main jet
- 1x bigger thinner one is for the float valve seat
- 1x bigger fat one is for the bowl drain screw
The new brass bits have them already installed so you only need those extra 3 O-rings if you're going to reuse your original brass bits. Also when you're using 4 rebuild kit you'll end up with 8 spare bigger O-rings for the fuel T-joint.
The kit doesn't come with a new brass float bowl drain screw so you have to buy them separately if they're damaged.
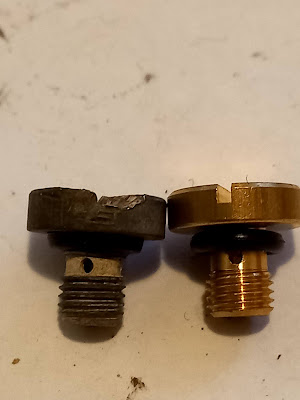 |
| old and new brass float bowl drain screw |
As you can see the main jet is held in place by a leaf spring. Just turn it 45 degrees and lift it off so you can remove the main jet.
 |
| CB500K1 main jet leaf spring |
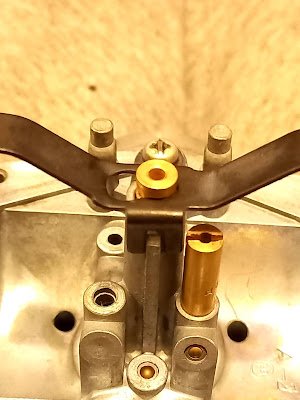 |
| Honda carburetor main jet leaf spring |
I carefully took out all the brass bits and removed the old O-rings, they almost removed themselfes as they were very very brittle ;) Try to remove the emulsion tube in the centre of the carbies, right underneath the main jet, by pushing it out with a wooden pick because brass is very soft and a metal driver could damage the brass.
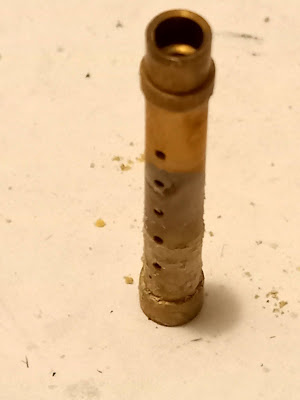 |
| Honda CB500 dirty emulsion tube |
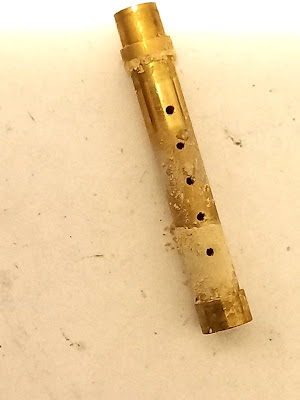 |
| Honda CB500 dirty emulsion tube |
After that I cleaned the brass bits with some wax and grease remover and pressed air and put 'em for 15-20 minutes in vinegar with a teaspoon of salt. This will take off all the oxidation and you'll end up with nice shiny parts.
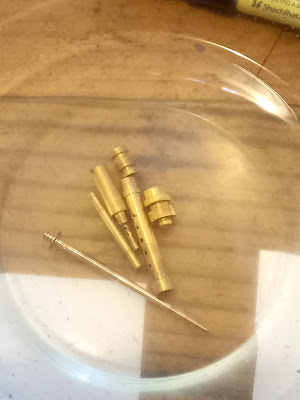 |
| Honda CB500K1cleaning brass bits in salty vinegar |
On stock (original) Honda CB500K1 carbie setups the following sizes/numbers are being used:
- Main jet 100
- Pilot jet 40
-Needle no. 272304
- Needle clip position 4th groove counted from top towards bottom groove)
- Throttle valve 25 (103)
- Float valve seat 1.8
- Float 129
 |
| Honda CB500K1 original Keihin 100 main jet |
 |
Honda CB500K1 original Keihin 40 pilot jet
|
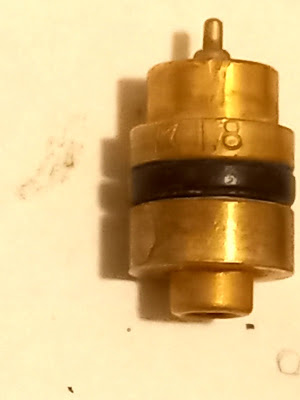 | | |
| Honda CB500K1 original Keihin 1.8 float valve seat | | | |
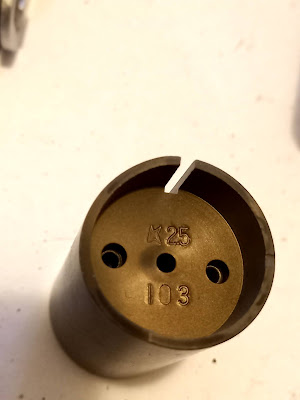 |
| Honda CB500 K1 original Keihin 25 throttle valve |
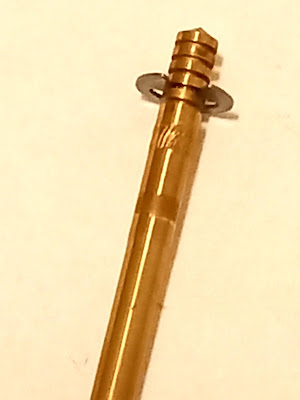 |
| Honda CB500K1 original Keihin needle no. 272304 |
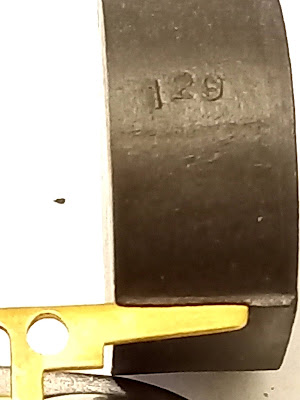 |
| Honda CB500 K1 original float 129 |
If you want to check the needle and see in what position (groove) the needle clip is you have to pop off the adjuster holder after taking out the synchronise screw (don't loose the small spring and golf tee which are below the synchronise screw inside the holder), take off the top lid, straighten the tongued washer and loosen the 7mm bolt that connects the link arm with the external throttle shaft. Gently pull out the throttle shaft and keep all the tiny bits in order on the shaft, put the 7mm bolt back in so the tiny bits can't fall off the throttle shaft. Don't forget the felt ring that's most of the time stuck in the throttle shaft opening of the carbie.When the shaft is out you can turn the link arm with throttle valve and needle 45 degrees (so the small lip at the bottom slides in the throttle valve groove, see pic below) and lift it out. After removing the two tiny screws at the bottom of the link arm the needle with clip can be taken out of the throttle valve.
 |
| Honda CB500K1 throttle slide rod |
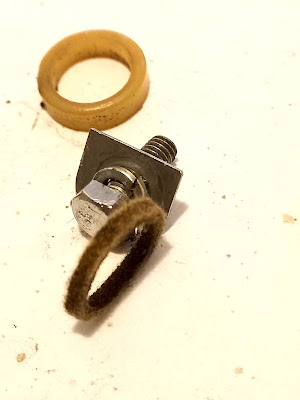 |
| Honda CB500K1 carburetor felt O-ring |
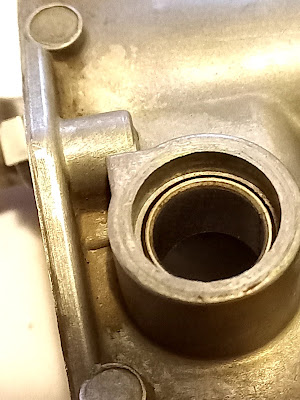 |
Honda CB500K1 carburetor felt O-ring location
|
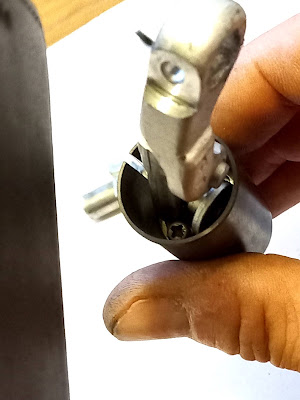 |
Honda CB500K1 carburetor throttle valve and link arm
|
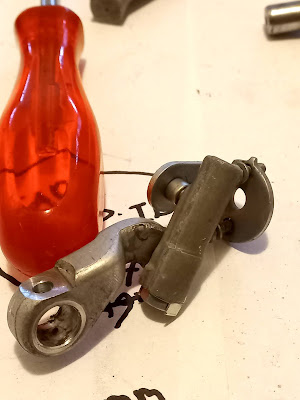 |
Honda CB500K1 carburetor throttle valve link arm
|
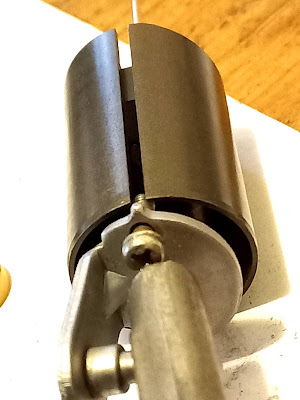 |
| Carbie lip link arm bottom slides in throttle valve groove |
The mounting plate (also called throttle assembly plate or (16094-323-004 stay plate in parts manual) received a good clean with wax and grease remover and some steel wool.
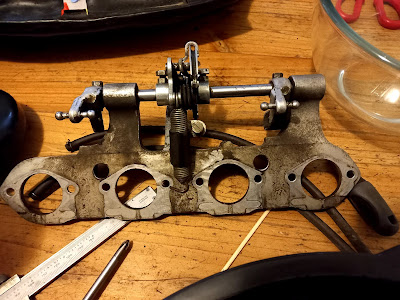 |
| Honda CB50 K1 mounting plate 16094-323-004 stay plate |
 |
| Honda CB500 K1 carburetor mounting plate |
In order to prevent flooding carbies it's important to check the float level (also check if the spring on top of the float needle is still "springy"). Hold the carburetor in a position so that the brass float lip that pushes the float needle into the seat just touches the spring valve of the needle. Then measure the distance from the top of the float to the carb body bottom, it should be exactly 22 mm. If not you can correct it by carefully bending the brass lip of the foat.
If you're gonna use the new float seat and needle from the rebuild kit you certainly have to adjust the level because it's different than the original Keihin one.
If the float level is incorrect your carbies will flood all the time because the float neede will never be deep enough in it's seat to completely cut off the fuel supply.
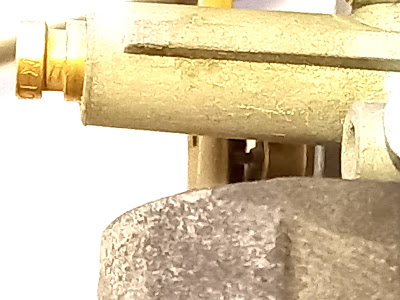 |
Brass lip float just touching the needle (see centre of pic)
|
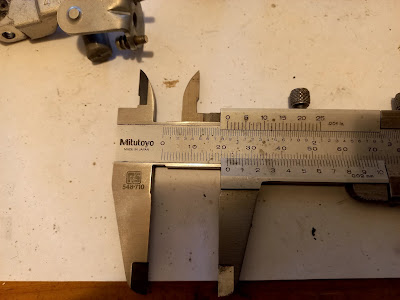 |
| Honda CB500K1 Carburetor float level is 22mm |
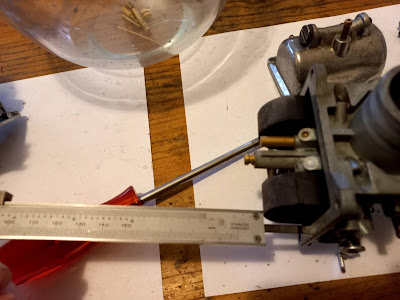 |
| Honda CB500K1 adjusting float level to 22mm |
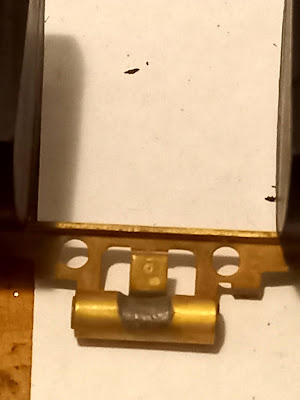 |
| Honda CB500 four brass float lip |
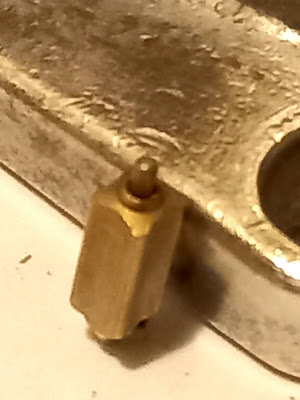 |
Honda CB500 float needle spring on top
|
Now all parts were cleaned it's time for some reassembling.
I started with putting back in the emulsion tube. After sliding it back in position it needs a small tap with a hammer to secure it in place. I used a bit that was big enough so it didn't slide inside the emulsion tube and gave it two light taps with a hammer.
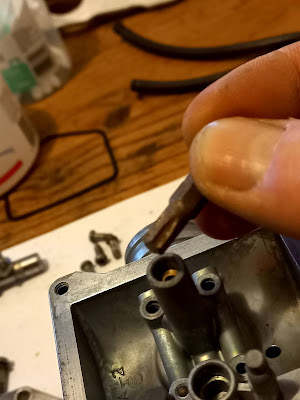 |
Honda CB500K1 fitting emulsion tube
|
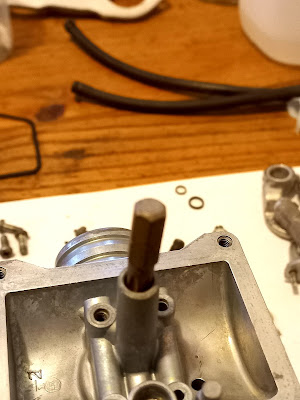 |
Honda CB500K1 fitting emulsion tube with metal bit
|
 |
| Honda CB500K1 correct position emulsion tube |
Now slip on the new O-rings on the main jets and throttle valve seat and click 'em back in place, mount the securing plate of the float valve seat, screw in the cleaned pilot jet and new air screw, put back in the float with it's brass rod and slip back on the leaf spring on the main jet. Next thing is putting back the float bowl with it's new brass drain screw. The rubber gasket is preformed and with a little bit of petroleum jelly it will stick into its groove in the float bowl while putting back in the 4 screws.
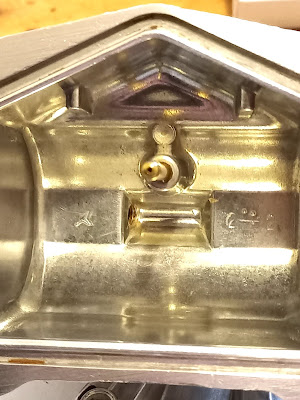 |
| Honda CB500K1 carburetor inside cleaned float bowl |
Now you can turn the carbie and reassemble the top side. Slide back in the throttle valve with link arm, push the felt ring back in place (put a drop of oil on it before you put it back), slide back in the connecting rod with all its pieces in the right order, (don't forget the plastic ring on the inside of the carb) and put back in the 7mm bolt with its tongued washer. Bend the tongued washer carefully with a pair of pliers.
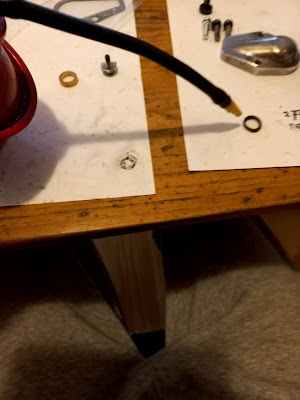 |
Honda CB500K1 carburetor felt ring oil drop
|
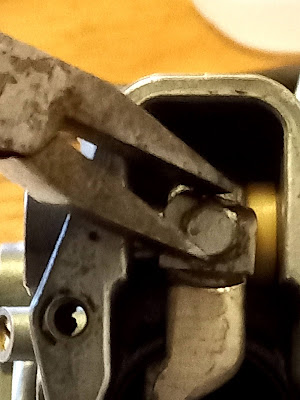 |
| Honda CB500K1 carburetor link arm connection |
When all four carbies have been rebuilt you can connect the 2 left ones and the 2 right ones. Don't forget to install the new fuel lines onto the T-joints before you put the carbies back together. The right fuel line size is 5.5mm. Now you can loosely screw the first pair back on the retaining plate. I leave the top covers off so it's easier to reconnect the adjuster holders and "bench synchronise" the carbies.
When putting back the adjuster holders on the carbies, first put in the spring and on top of it the tiny metal rod with the cup side upwards, then click it back on the ball joint and screw back in the adjuster screw, don't forget the rubber piece that goes between the carb arm and holder (see pic for the right position, left right top bottom).
When you connect the adjuster holder to the retaining plate ball joint, just slip the ball joint in then put back in the tiny rod with the cupside downwards , slide the spring over it and screw back on the metal cap.
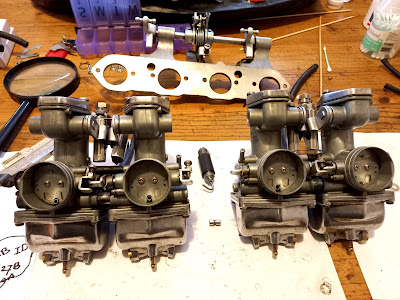 |
| Honda CB500K1 carburetor set |
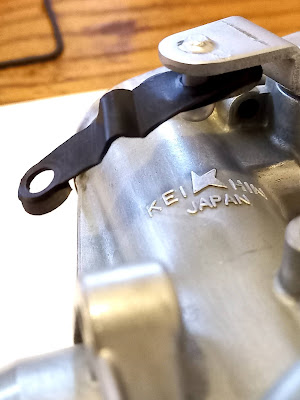 |
Carburetor rubber piece in correct position
|
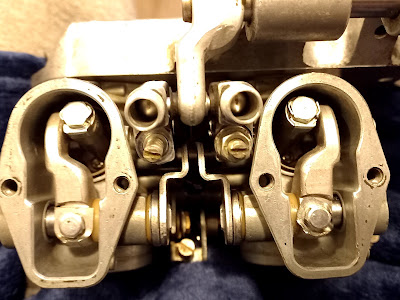 |
Honda CB500K1 carburetor adjuster holder without sync link
|
 |
| Honda CB500K1 carburetors fuel line 5.5 mm |
 |
| Honda CB500K1 T-joint with 5.5 mm fuel line |
When attaching the second pair of carbies, don't forget the tiny grooved rod for the throttle return spring that goes in between, it can be a bit fiddly but with some grease it will stick in one of it's mounting holes without falling out all the time.
When everything is back in place I "bench sychronised" the 4 carburetors, if you don't do this you will never be able to start the bike. The best way to do this is with a 1/8 (3.18mm) drill bit. You can adjust the height of the throttle valve with the special adjuster screw in the adjuster holder. As you turn it you can see the throttle slide go up and down. Slip the smooth part of the drill bit between the carb and throttle slide bottom and adjust the height so the throttle slide will just touch the drill bit. then tighten the lock nut while holding the adjuster screw in place. Make sure the sync link is nice in the middle and be careful not to put tension on it while tightening the nuts as the sync link can snap easily.
Check the clearance again after tightening the lock nut.
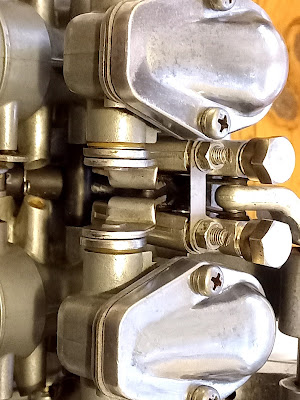 |
| Honda CB500K1 carburetor adjuster holders with sync link plate |
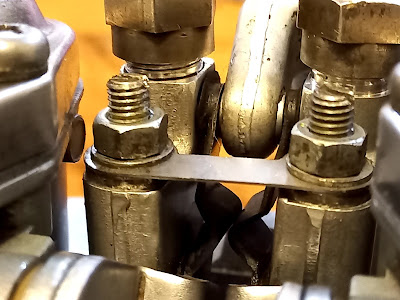 |
| Honda CB500K1 carburetor adjuster holders with sync link plate |
 |
| Honda CB500K1 carburetor "bench synchronising" |
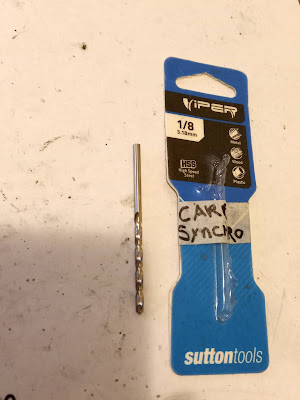 |
| Honda CB500K1carbie synchro drill bit 1/8 |
Now you can put back on the top covers with new gaskets. Make sure you push them away from the adjuster holders as they are moving up and down very close to the carbs and can get stuck underneath the carb edge and/or gasket and top cover.
I'll install the overflow tubes and air filterbox later when everything is back on the bike.
Also have a look at this awesome in detail tutorial from Classic Octane about rebuilding Honda Keihin carbies https://www.youtube.com/watch?v=JFTOfYl5BSc I watched it several times while rebuilding my CB500 carbies.
All done, back in the box for now.
 |
Honda CB500K1 carburetor set rebuild
|
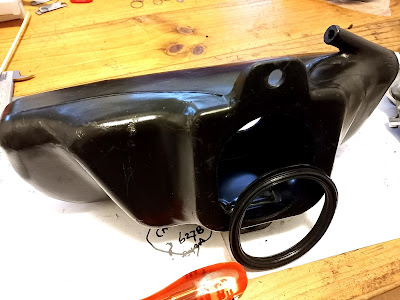 |
Honda CB500K1 air filter box with seal
|
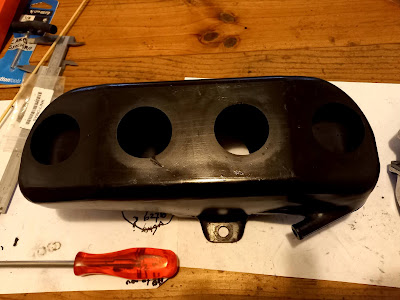 |
| Honda CB500K1 air filter box |
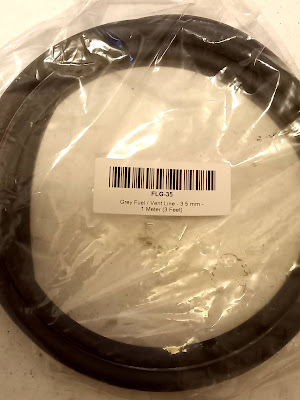 |
| Honda grey fuel line for overflow |


