After I managed to start the bike (before the resto) most electronic stuff seemed to work. The only things that were damaged were the left hand switch assembly and the rear brake switch (Notorious for rusting on the inside while standing for years).
Luckily you can buy nice reproduction switch assemblies and because the right one still did the job but was faded to some sort of dull gray I ordered the switch assemblies for both sides of the handlebar (3 in total). Later on I realised I didn't need the smallest switch as the new right and left switch were the USA style ..
 |
| Honda CB500K1 left handlebar switch |
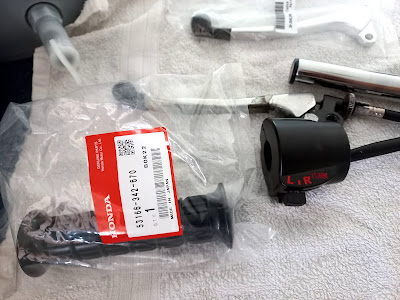 |
| Honda CB500K1 another left handlebar switch |
 |
| Honda CB500K1 right handlebar switch |
The main wiring harness had become very hard and brittle and I decided to buy a new one as they are not too expensive (around $85,-) and you don't want to get electrical trouble later on because there's a broken wire you can't see etc.
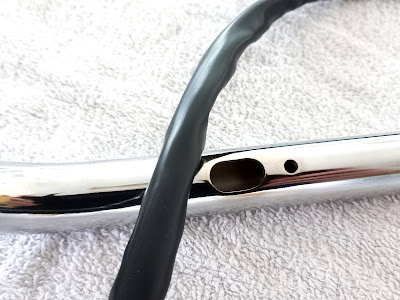
Well.. at the end of my shopping spree I replaced almost everything connected to the handlebar, including the handlebar itself. I think the handlebar on the bike wasn't original, pitted and somebody drilled/grinded oval shaped holes in it...
I couldn't find an original CB500K1 handlebar but found a new CB550 handlebar that looks pretty similar (a bit less high). It came with plastic end plugs but you need to remove them if you want a nice fit for your handle grips.
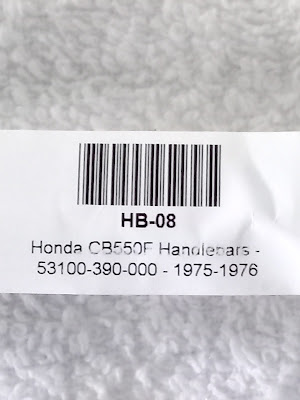 |
| Honda CB550 handlebar |
 |
| Honda CB500 handlebar ready for assembly |
When you install the new switch assemblies you have to feed the wiring through the handle bar which can be pretty fiddly.
I used some wire and wrapped it around the bunch of wires and then made it a tight "arrow" with electric tape. To make everything a bit more smooth I sprayed some silicone spray inside the handlebar. Make sure your wire is long enough to wrap it around your hand while pulling the wires trough the handlebar, it will make things a bit easier.
 |
| Honda CB500 handlebar ready for assembly |
 |
| Honda CB500 handlebar ready for assembly |
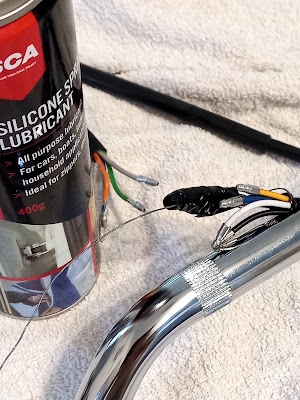 |
| Honda CB500 handlebar wiring |
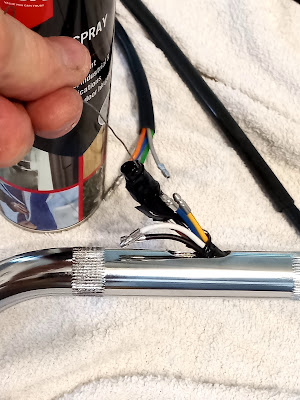 |
| Honda CB500 handlebar wiring |
 |
| Honda CB500 handlebar wiring |
The first attempt went pretty well, but then I discovered I put the left hand switch assembly on the right side of the handlebar because it was laying upside down.. crap haha good exercise..
Note that the wires from the small light switch assembly, the one that I didn't need at the end, run on the outside of the handlebar.
Next thing was to fit the grips over the handlebar and throttle handle. A good trick to slide the grip over the plastic trottle handle and the left side of the handlebar is to grab a bottle of vodka and pour some inside the grip. It will slide on smoothly and the alcohol will evaporate in a couple of minutes whereafter the grip sits nice and tight... Time to pour yourself a nice big shot of vodka ;)
 |
| Honda CB500 fitting the grip handles with Vodka |
When you fit the handlebar make sure the master brake cylinder is horizontal because you can only move it till a certain degree before its hose connection point will hit the handlebar.I moved it forwards as far as possible and then used a level on top of the reservoir cap to put the bar in the best position (horizontal brake master cylinder).
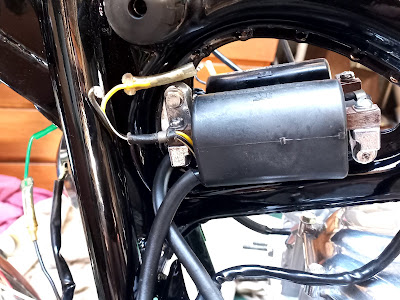
As the frame was painted black with two pac I had to sand some off at the point where the bolts of the coils go through. This is the main point for the earth connection so it needs to be good. After sanding till bare metal I put on some dielectric grease to prevent corrossion in the future.
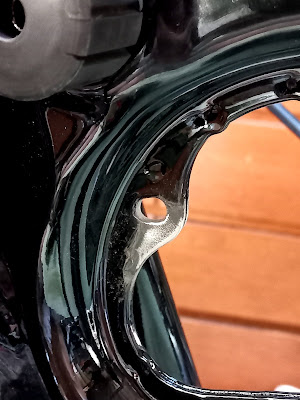 |
| Honda CB500K1 stripping new paint to make a good earth connection |
After this I mounted the coils and started with installing all the wiring. It's a bit of a fiddly job but not too hard just work slow and follow the colours. I started with laying out the main wiring harnass and first connected the coil wiring and copper earth ring that goes behind the left tank rubber. From there I worked my way to the rear fender. Make sure you follow the right routing for the wires and harness.I made some pics and a mini video following the cables as a guideline before I dissasembled the bike. Keep in mind that Honda used green as the earth (neg) wire colour back in the day.
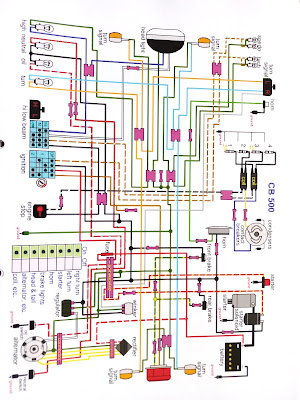 |
Honda CB500K1 coloured wiring diagram
|
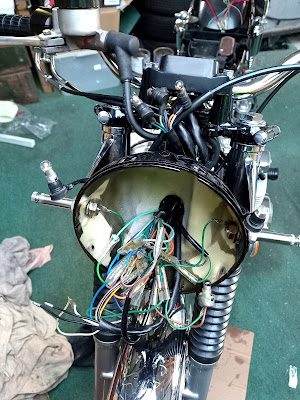 |
Honda CB500K1 wiring inside headlight shell
|
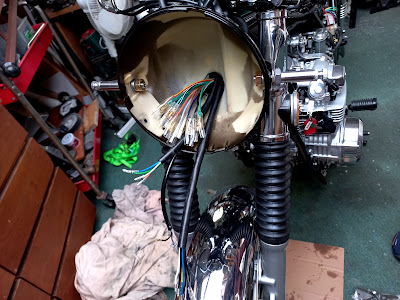 |
Honda CB500K1 wiring inside headlight shell
|
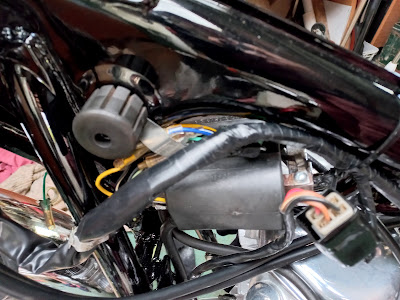 |
| Honda CB500K1 wiring around the coils |
 |
Honda CB500K1 wiring
|
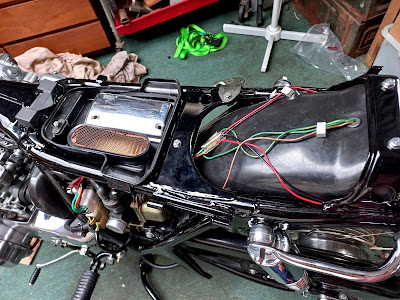 |
| Honda CB500K1 wiring around rear fender |
I had some other minor issues with electrical components in the bike, weird how things can break during a resto; you take off a working part and when you put it back on during reassembly it's not working anymore...
This happened with the oil pressure switch, main fuse and the indicator relay.
When I connected the oil pressure switch it didn't light up the red oil light in the instrument panel. All wiring seemed to be ok and the 12V3W bulb was fine. So I checked the oil pressure switch with an easy test: run a wire from a battery to a bulb and another wire from the bulb to the top of the pressure switch, then another wire from the battery to the earth of the bike or if the switch is already out, to the metal bottom part of the switch. If the testlight comes on the switch is probably ok, if not, well...it's broken, the invisible pressure switch inside stays open even when there's no oil pressure. Luckily I could get another original superseded Honda oil pressure switch at the local Honda dealer, not really cheap but hey you need it..
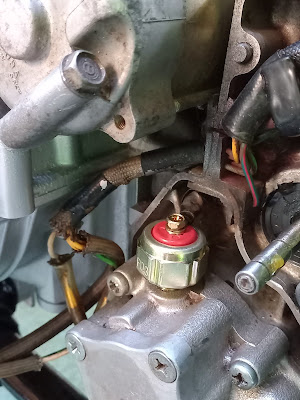
When you put it back in don't try to wrench the oil pressure switch all the way in as the threaded part is tapered and you may risk cracking your engine case
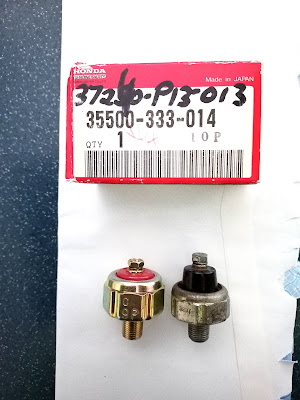 |
| Honda CB500K1 new and old oil pressure switch |
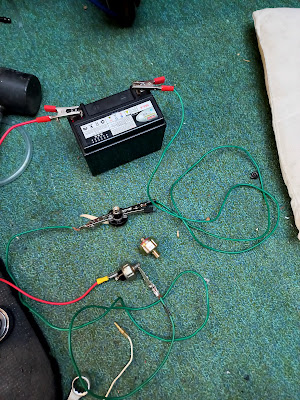 |
| Honda CB500 four testing oil pressure switch |
 |
| Honda CB500K1 tapered oil pressure switch location |
 |
| Honda CB500K1 new tapered oil pressure switch |
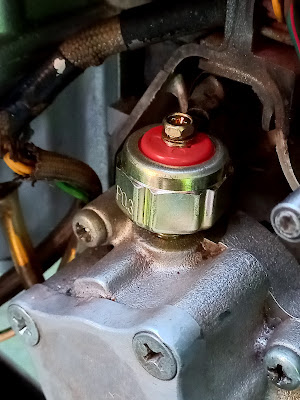 |
Don't try to torque the tapered oil pressure switch all the way in
|
The other thing I had to replace was the old flasher relay. The new indicators worked but didn't flash. Only when I knocked on the relay it would let the indicators flash just once. So I opened up the relay and cleaned all the contact points, But no luck this time and while testing the relay I also got zapped ;).
So I went to the local auto parts store and bought a new 3 pin 12V relay and now everything works perfectly again.
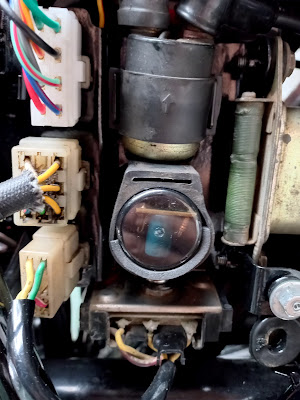 |
Honda CB500K1 new flasher relay in the middle of pic
|
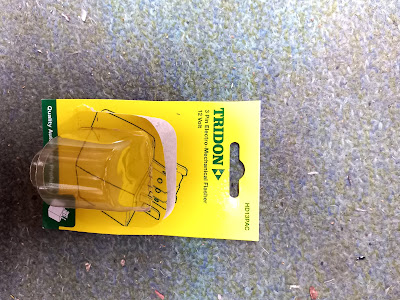 |
| Honda CB500K1 new Tridon flasher relay |
 |
New flasher relay installed
|
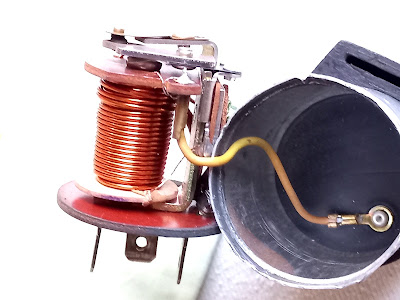 |
| Honda CB500K1 old original flasher relay |
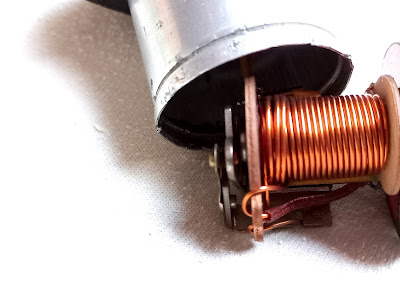 |
| Honda CB500K1 old original flasher relay |
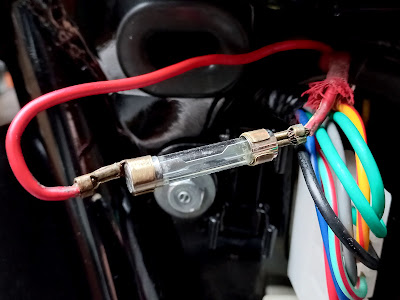
All electrical components worked as should but when I checked it the next day nothing happened when I turned the key... The 15Amp fuse looked fine but when I bridged it everything worked again. I had another close look at the fuse and when I took it out I saw all corrosion between the back of the fuse and conecting points. Easy fix this time just cleaned the connecting points with some fine sandpaper and grabbed a new fuse, all good again. Btw the glass fuses I have are too big for the original fuseholder underneath the seat. I wonder if you can still buy the smaller versions...
 |
| Honda CB500K1 corroded 15 Amp glass fuse |
 |
| Honda CB500K1 corroded 15 Amp glass fuse |
 |
| Honda CB500K1 new 15 Amp glass fuse |
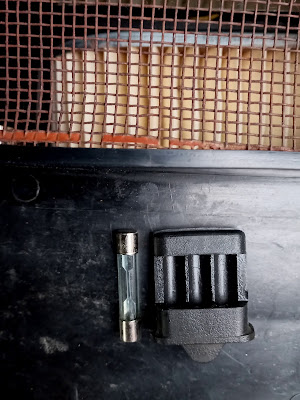 |
| Honda CB500K1 15 Amp glass fuse too big for fuse holder |
The next part that was starting to die was the starter switch (also called starter solenoid ).When pushing the starter button you could hear a click but half of the time nothing else happened. After a couple of pushes it would give the starter motor enough amps to engage. I cleaned all connection points again and put dielectic grease on it but nothing changed. So I decided to look for another one because I wanted a more relaible bike and not have to worry about if it would start the next time or not.
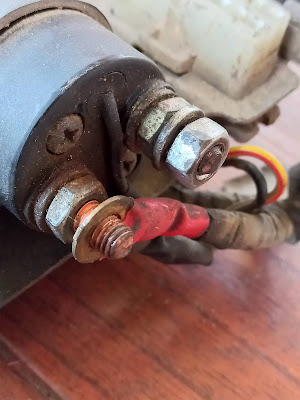 |
| Honda CB500K1 original starter switch |
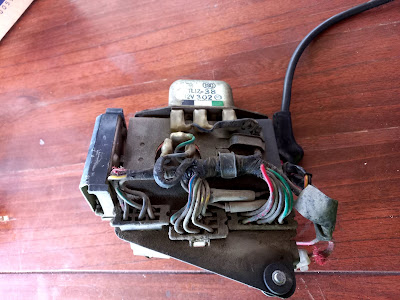 |
Honda CB500K1 starter switch connection (right middle)
|
 |
| Honda CB500K1 original starter switch |
Original Honda starter solenoids were hard to find and overly expensive (eg CMS wants AUD 170,- for it). A starter solenoid is basically nothing more than a big switch that bridges the positive battery lead to the starter motor and changes low amps into high amps.
If you look inside a starter solenoid you'll find a copper coil and a thick copper plate on top. when the starter button is pushed the coil will create a magnetic field which pushes the copper plate up against the 2 copper poles of the solenoid and thus allowing current to flow from the battery to the starter motor.
 |
| Schematic drawing of starter circuit Honda CB500K1 |
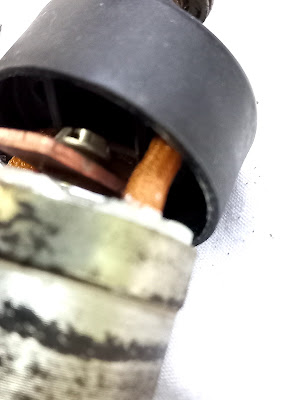 |
| Honda CB500K1 inside original starter solenoid |
 |
| Honda CB500K1 inside original starter solenoid |
To make sure the original starter solenoid was fried (or not) I ran some tests;
First take the solenoid out of the bike and then connect it to a battery. The solenoid is not polarity sensitive so it doesn't matter which connection you use for the pos or neg. However it is polarity sensitive regarding the starter button connection wires so get that one right (yellow/red is pos, black or green is negative). As soon as you connect it you should hear a clicking sound made by the copper plate pushed onto the two copper connection points inside the solenoid.
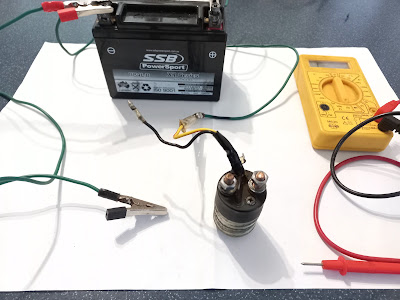 |
| Honda CB500K1 testing original starter solenoid |
Next step is to measure the resistance between the two poles of the starter solenoid. When not connected to the battery your multimeter should display 1 or OL or something similar because there should be no connection between them.
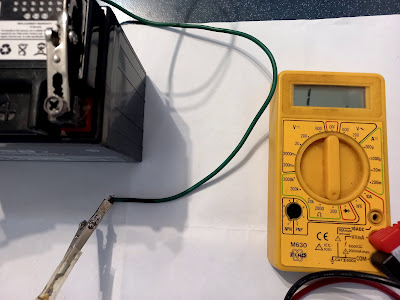 |
| Honda CB500K1 testing original starter solenoid |
 |
| Honda CB500K1 testing original starter solenoid |
When the starter solenoid is connected to the battery and it clicks you should get a reading of somewhere between 0.6 and 0.2 Ohms, if that's the reading of your solenoid it is fine.
Mine showed 186 and the next time 0,2 Ohms. not totally cooked but unrelaible nevertheless. This can happen when the copper connection points get pitted and/or corroded.
When testing your intermittent starter solenoid, never connect the battery power longer than one minute or you'll risk the chance of frying your solenoid coil.
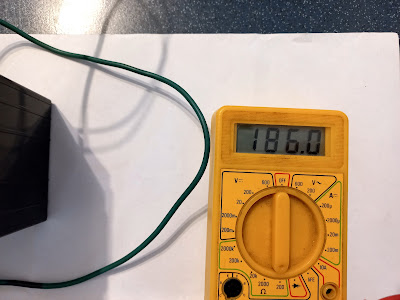 |
Honda CB500K1 original starter solenoid Ohms way to high
|
I started looking for a cheaper generic solenoid as you cant see it anyway on the bike. As long as you search for intermittent solenoids with roughly the same shape and only two leads you're good to go. I found a good one for around 30 bucks. The wire connections to the starter button are a bit different but it's an easy job to crimp some honda style connectors on them.
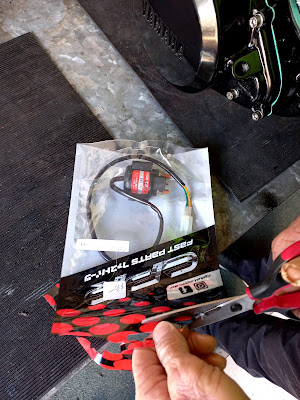 |
| Honda CB500K1 new generic starter solenoid |
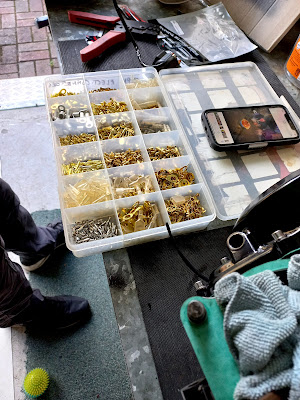 |
| Honda CB500K1 new starter solenoid crimping connections |
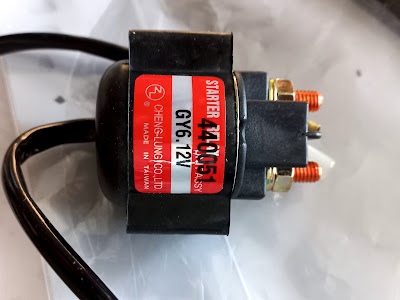 |
| Honda CB500K1 new starter solenoid |
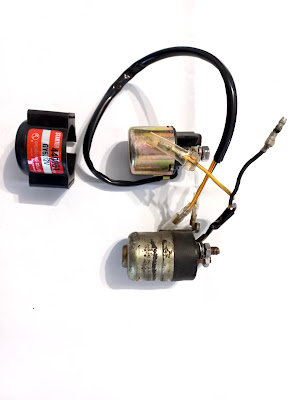 |
| Honda CB500K1 new and original old starter solenoid |
All good now.


