Monday, 18 April 2022

Honda CB500K1 1972 electrical wiring stuff

After I managed to start the bike (before the resto) most electronic stuff seemed to work. The only things that were damaged were the left hand switch assembly and the rear brake switch (Notorious for rusting on the inside while standing for years). 

 Luckily you can buy nice reproduction switch assemblies and because the right one still did the job but was faded to some sort of dull gray I ordered the switch assemblies for both sides of the handlebar (3 in total). Later on I realised I didn't need the smallest switch as the new right and left switch were the USA style ..

Honda CB500K1 left handlebar switch

Honda CB500K1 left handlebar switch
Honda CB500K1 another left handlebar switch


Honda CB500K1 right handlebar switch


The main wiring harness had become very hard and brittle and I decided to buy a new one as they are not too expensive (around $85,-) and you don't want to get electrical trouble later on because there's a broken wire you can't see etc.

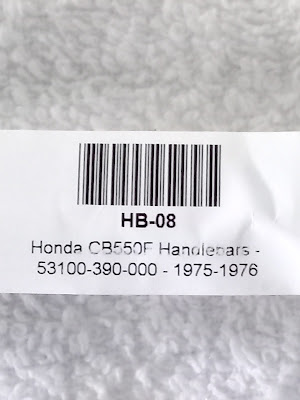
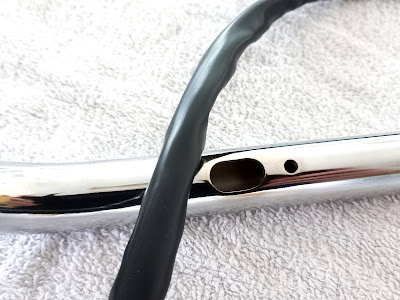
Well.. at the end of my shopping spree I replaced almost everything connected to the handlebar, including the handlebar itself. I think the handlebar on the bike wasn't original, pitted and somebody drilled/grinded oval shaped holes in it... I couldn't find an original CB500K1 handlebar but found a new CB550 handlebar that looks pretty similar (a bit less high). It came with plastic end plugs but you need to remove them if you want a nice fit for your handle grips. 

Honda CB550 handlebar

Honda CB500 handlebar ready for assembly


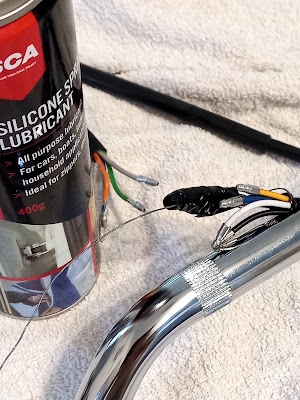
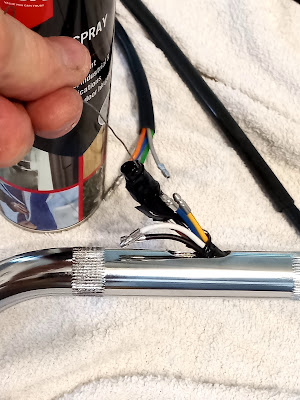
When you install the new switch assemblies you have to feed the wiring through the handle bar which can be pretty fiddly. I used some wire and wrapped it around the bunch of wires and then made it a tight "arrow" with electric tape. To make everything a bit more smooth I sprayed some silicone spray inside the handlebar. Make sure your wire is long enough to wrap it around your hand while pulling the wires trough the handlebar, it will make things a bit easier. 

Honda CB500 handlebar ready for assembly

Honda CB500 handlebar ready for assembly

Honda CB500 handlebar wiring

Honda CB500 handlebar wiring

Honda CB500K1 handlebar wiring
Honda CB500 handlebar wiring


The first attempt went pretty well, but then I discovered I put the left hand switch assembly on the right side of the handlebar because it was laying upside down.. crap haha good exercise.. 

Note that the wires from the small light switch assembly, the one that I didn't need at the end, run on the outside of the handlebar.

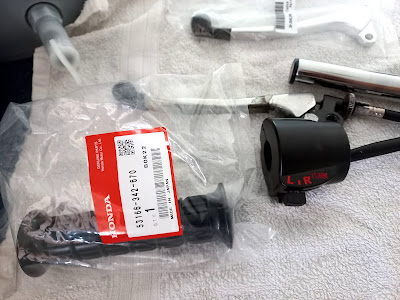
Next thing was to fit the grips over the handlebar and throttle handle. A good trick to slide the grip over the plastic trottle handle and the left side of the handlebar is to grab a bottle of vodka and pour some inside the grip. It will slide on smoothly and the alcohol will evaporate in a couple of minutes whereafter the grip sits nice and tight... Time to pour yourself a nice big shot of vodka ;)

Honda CB500 fitting the grip handles with Vodka

 When you fit the handlebar make sure the master brake cylinder is horizontal because you can only move it till a certain degree before its hose connection point will hit the handlebar.I moved it forwards as far as possible and then used a level on top of the reservoir cap to put the bar in the best position (horizontal brake master cylinder).

As the frame was painted black with two pac I had to sand some off at the point where the bolts of the coils go through. This is the main point for the earth connection so it needs to be good. After sanding till bare metal I put on some dielectric grease to prevent corrossion in the future.

Honda CB500K1 stripping paint to make a good earth connection
Honda CB500K1 stripping new paint to make a good earth connection

Honda CB500K1 installing the coils


After this I mounted the coils and started with installing all the wiring. It's a bit of a fiddly job but not too hard just work slow and follow the colours. I started with laying out the main wiring harnass and first connected the coil wiring and copper earth ring that goes behind the left tank rubber. From there I worked my way to the rear fender. Make sure you follow the right routing for the wires and harness.I made some pics and a mini video following the cables as a guideline  before I dissasembled the bike. Keep in mind that Honda used green as the earth (neg) wire colour back in the day.

Honda CB500K1 coloured wiring diagram


Honda CB500K1 wiring inside headlight shell


Honda CB500K1 wiring inside headlight shell


Honda CB500K1 wiring around the coils


Honda CB500K1 wiring


Honda CB500K1 around rear fender
Honda CB500K1 wiring around rear fender

I had some other minor issues with electrical components in the bike, weird how things can break during a resto; you take off a working part and when you put it back on during reassembly it's not working anymore...

This happened with the oil pressure switch, main fuse and the indicator relay.

When I connected the oil pressure switch it didn't light up the red oil light in the instrument panel. All wiring seemed to be ok and the 12V3W bulb was fine. So I checked the oil pressure switch with an easy test: run a wire from a battery to a bulb and another wire from the bulb to the top of the pressure switch, then another wire from the battery to the earth of the bike or if the switch is already out, to the metal bottom part of the switch. If the testlight comes on the switch is probably ok, if not, well...it's broken, the invisible pressure switch inside stays open even when there's no oil pressure. Luckily I could get another original superseded Honda oil pressure switch at the local Honda dealer, not really cheap but hey you need it..
When you put it back in don't try to wrench the oil pressure switch all the way in as the threaded part is tapered and you may risk cracking your engine case

Honda CB500K1 new and old oil pressure switch

Honda CB500K1 testing oil pressure switch
Honda CB500 four testing oil pressure switch

Honda CB500K1 tapered oil pressure switch location

Honda CB500K1 new tapered oil pressure switch

Honda CB500K1 new tapered oil pressure switch
Don't try to torque the tapered oil pressure switch all the way in


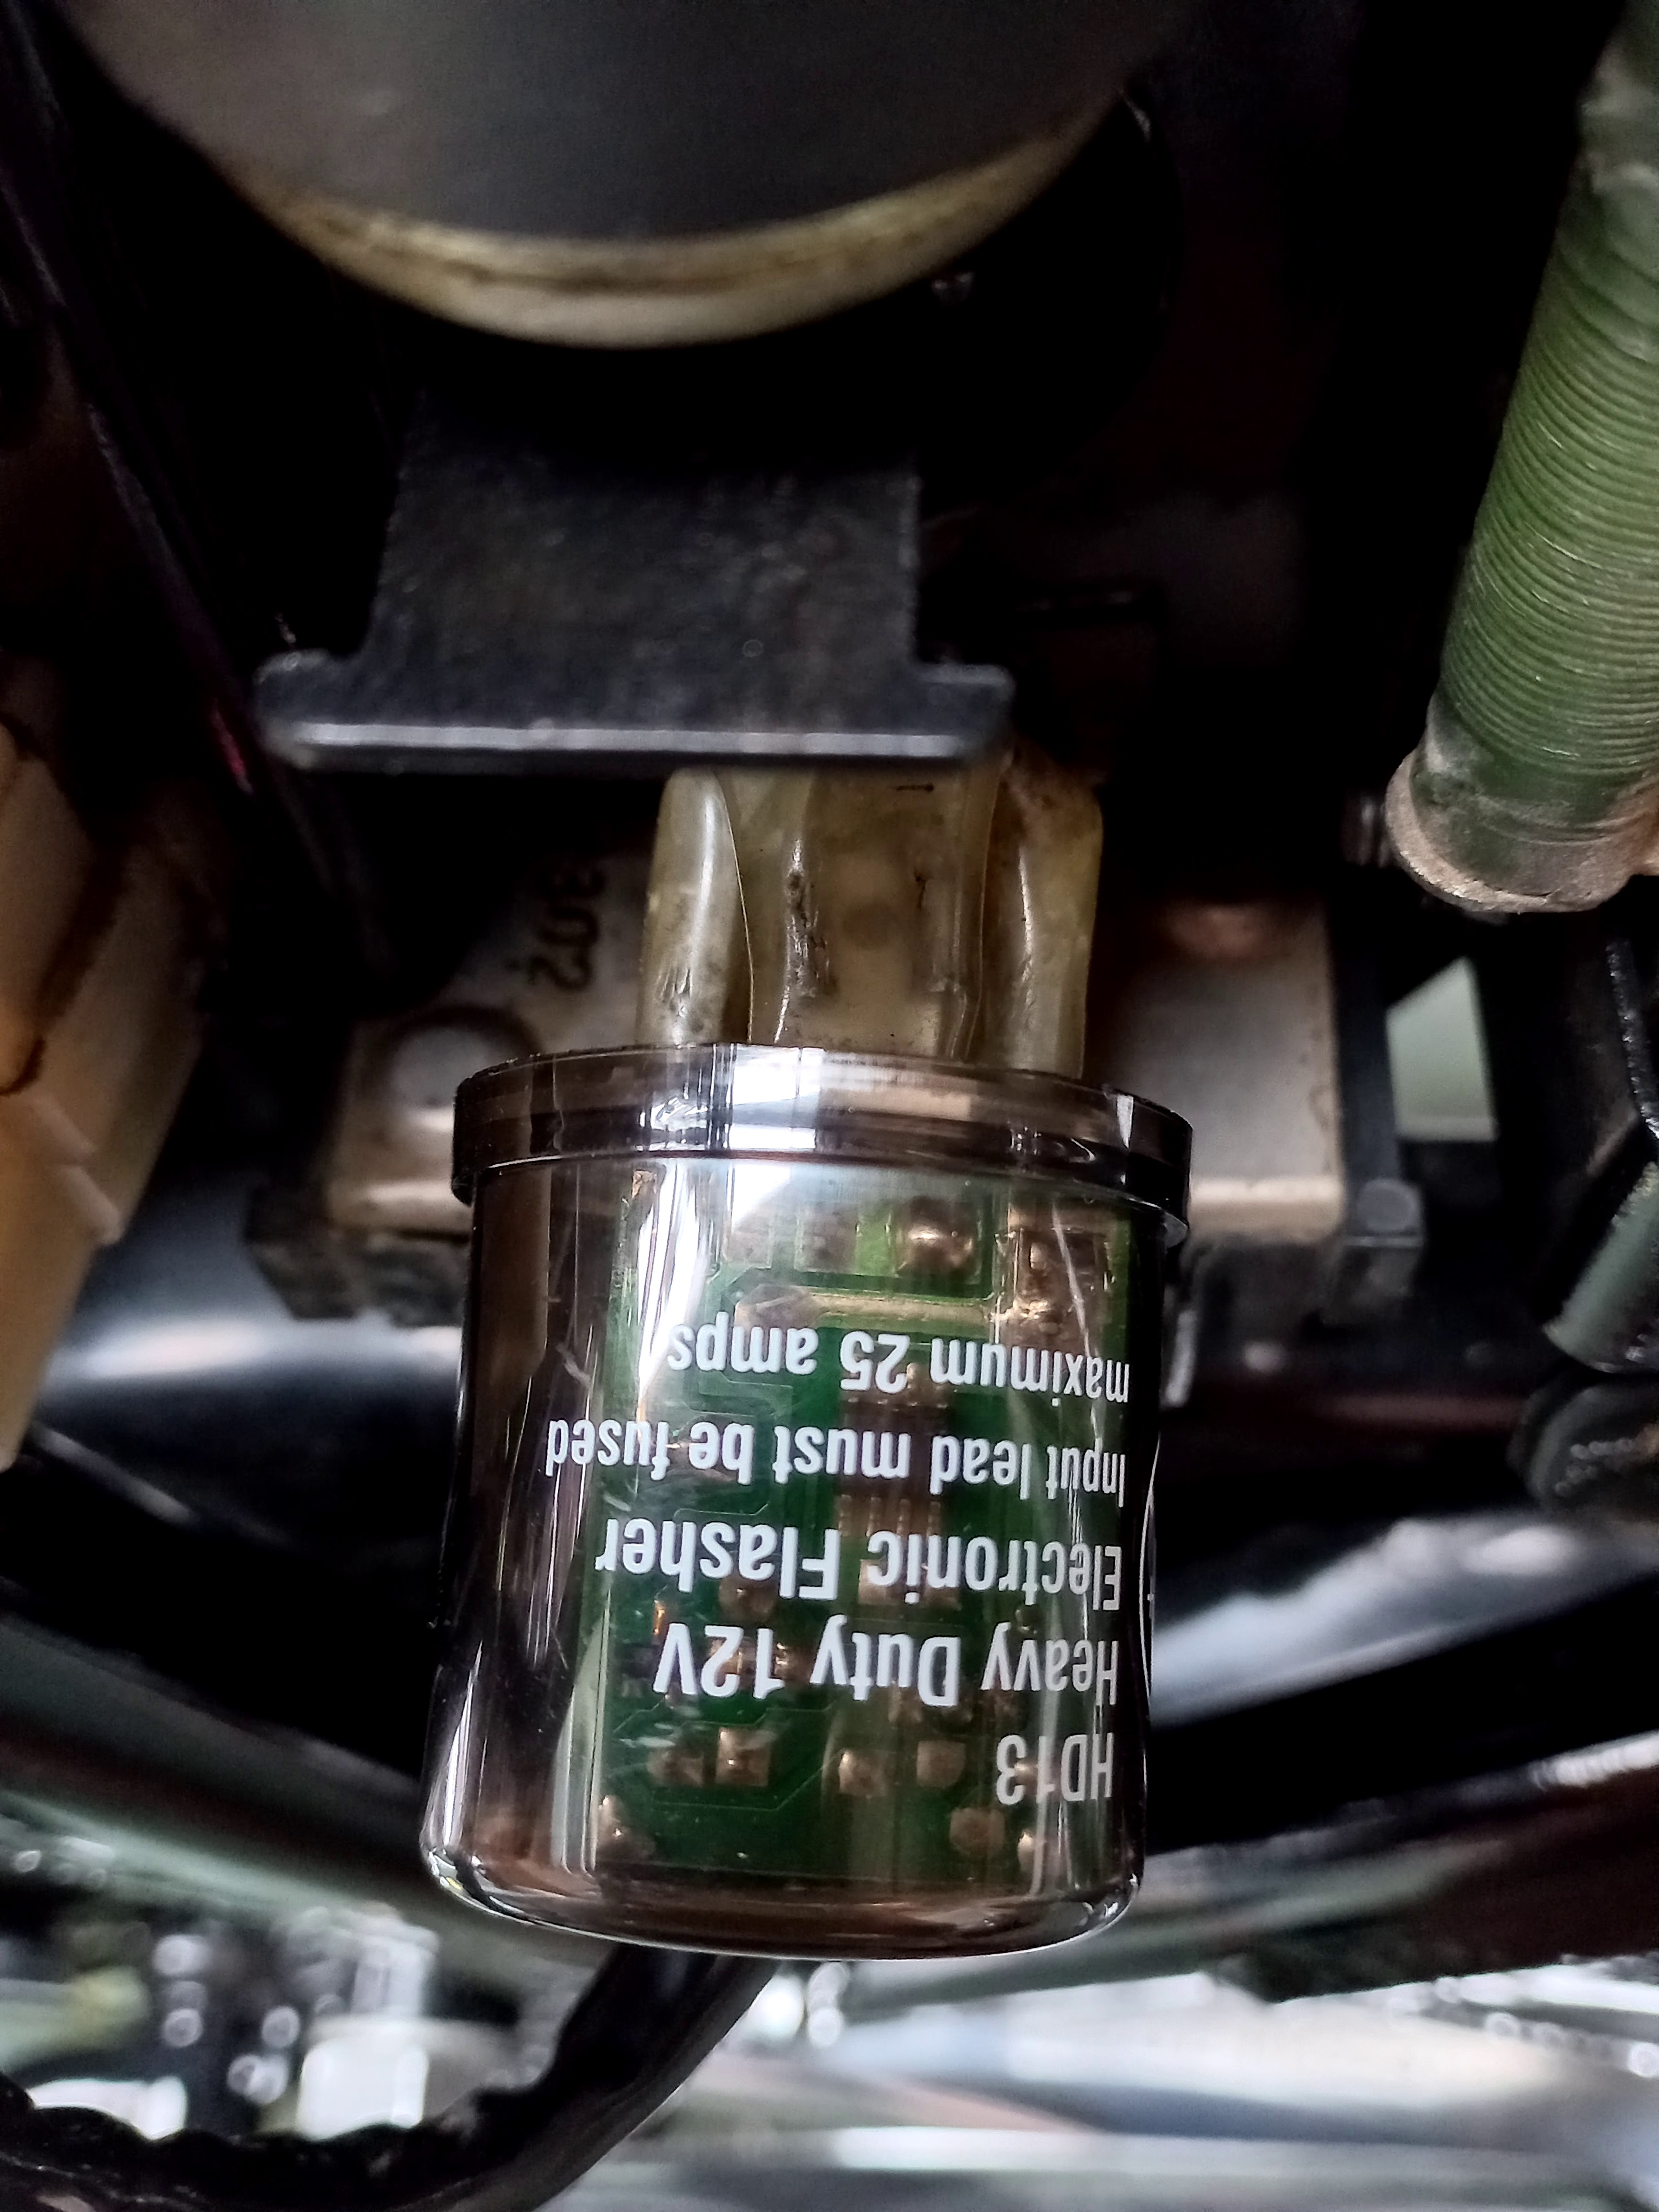
The other thing I had to replace was the old flasher relay. The new indicators worked but didn't flash. Only when I knocked on the relay it would let the indicators flash just once. So I opened up the relay and cleaned all the contact points, But no luck this time and while testing the relay I also got zapped ;).

So I went to the local auto parts store and bought a new 3 pin 12V relay and now everything works perfectly again.


Honda CB500K1 new flasher relay
Honda CB500K1 new flasher relay in the middle of pic

Honda CB500K1 new flasher relay
Honda CB500K1 new Tridon flasher relay

Honda CB500K1 new flasher relay
New flasher relay installed

Honda CB500K1 old original flasher relay

Honda CB500K1 1972 old original flasher relay
Honda CB500K1 old original flasher relay

All electrical components worked as should but when I checked it the next day nothing happened when I turned the key... The 15Amp fuse looked fine but when I bridged it everything worked again. I had another close look at the fuse and when I took it out I saw all corrosion between the back of the fuse and conecting points. Easy fix this time just cleaned the connecting points with some fine sandpaper and grabbed a new fuse, all good again. Btw the glass fuses I have are too big for the original fuseholder underneath the seat. I wonder if you can still buy the smaller versions...

Honda CB500K1 15 Amp glass fuse
Honda CB500K1 corroded 15 Amp glass fuse

Honda CB500K1 15 Amp glass fuse
Honda CB500K1 corroded 15 Amp glass fuse

Honda CB500K1 15 Amp glass fuse
Honda CB500K1 new 15 Amp glass fuse

Honda CB500K1 15 Amp glass fuse too big for fuse holder

The next part that was starting to die was the starter switch (also called starter solenoid ).When pushing the starter button you could hear a click but half of the time nothing else happened. After a couple of pushes it would give the starter motor enough amps to engage. I cleaned all connection points again and put dielectic grease on it but nothing changed. So I decided to look for another one because I wanted a more relaible bike and not have to worry about if it would start the next time or not.


Honda CB500K1 starter switch
Honda CB500K1 original starter switch

Honda CB500K1 starter switch connection
Honda CB500K1 starter switch connection (right middle)

Honda CB500K1 starter switch on main board
Honda CB500K1 original starter switch

Original Honda starter solenoids were hard to find and overly expensive (eg CMS wants AUD 170,- for it). A starter solenoid is basically nothing more than a big switch that bridges the positive battery lead to the starter motor and changes low amps into high amps.

If you look inside a starter solenoid you'll find a copper coil and a thick copper plate on top. when the starter button is pushed the coil will create a magnetic field which pushes the copper plate up against the 2 copper poles of the solenoid and thus allowing current to flow from the battery to the starter motor.

Schematic drawing of starter circuit Honda CB500K1

Honda CB500K1 inside original starter solenoid

Honda CB500K1 1972 inside original starter solenoid
Honda CB500K1 inside original starter solenoid

To make sure the original starter solenoid was fried (or not) I ran some tests;
First take the solenoid out of the bike and then connect it to a battery. The solenoid is not polarity sensitive so it doesn't matter which connection you use for the pos or neg. However it is polarity sensitive regarding the starter button connection wires so get that one right (yellow/red is pos, black or green is negative).  As soon as you connect it you should hear a clicking sound made by the copper plate pushed onto the two copper connection points inside the solenoid.

Honda CB500K1 testing original starter solenoid

Next step is to measure the resistance between the two poles of the starter solenoid. When not connected to the battery your multimeter should display 1 or OL or something similar because there should be no connection between them.

Honda CB500K1 testing original starter solenoid

Honda CB500K1 four testing original starter solenoid
Honda CB500K1 testing original starter solenoid

 When the starter solenoid is connected to the battery and it clicks you should get a reading of somewhere between 0.6 and 0.2 Ohms, if that's the reading of your solenoid it is fine.
Mine showed 186 and the next time 0,2 Ohms. not totally cooked but unrelaible nevertheless. This can happen when the copper connection points get pitted and/or corroded.
When testing your intermittent starter solenoid, never connect the battery power longer than one minute or you'll risk the chance of frying your solenoid coil.


Honda CB500K1 testing original starter solenoid
Honda CB500K1 original starter solenoid Ohms way to high

I started looking for a cheaper generic solenoid as you cant see it anyway on the bike. As long as you search for intermittent solenoids with roughly the same shape and only two leads you're good to go. I found a good one for around 30 bucks.  The wire connections to the starter button are a bit different but it's an easy job to crimp some honda style connectors on them.

Honda CB500K1 new generic starter solenoid

Honda CB500K1 new starter solenoid crimping connections

Honda CB500K1 new starter solenoid

Honda CB500K1 new and original old starter solenoid
All good now.


Friday, 4 March 2022

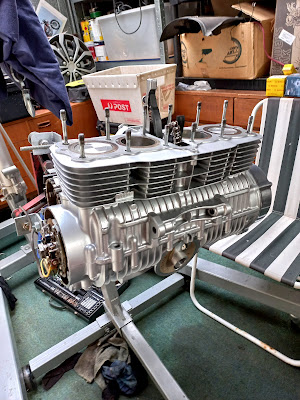
Honda CB500K1 engine

Time to open the engine...

After a couple of weeks spraying all the bolts and nuts with WD40 I loosened all of them without any difficulties.The only problem was the ultra strong (allmost like locktite) liquid gasket between the head cover and head, but before I realized it, it was already to late and because the head cover got "glued"  to the head on one site it flipped and slightley bent one outlet valve.. grr.. This can happen because the tappets/valve rocker arms are mounted inside the head cover and the valve stems will put a lot of pressure on them and the cover. 

 The most logical explanation for this small drama would be that the previous guy who installed the rubber seal between the head and cover used an overdose of "super glue" to keep the seal in place while installing the head cover.

Luckily the head cover wasn't bent.


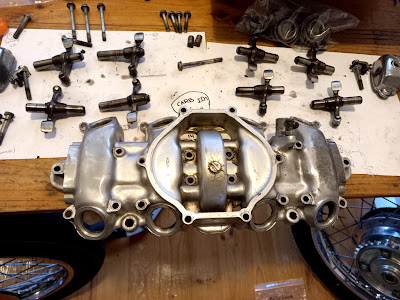
Cylinder head cover honda CB500K1 1972

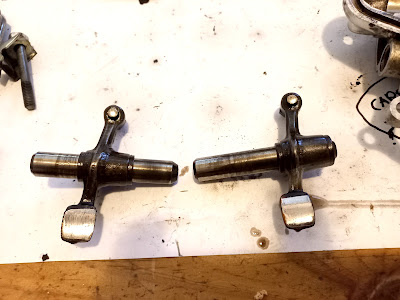
Valve rocker arms Honda CB500K1 1972
Valve rocker arms Honda CB500K1

Head cover parts Honda CB500K1 1972

I carefully tried to cut the glue loose with a razorblade and after some #$%! and beers the head cover finally separated from the head. You can remove the rocker arms and shafts by screwing a long 6mm bolt into the arm shaft and simply pull them out of the head cover.

After spraying WD40 on the cylinder head bolts for a couple of days I removed the head  and barrel. A lot of carbon build up but nothing too serious. The pistons didn't look too bad but two of them had their rings stuck in the ring lands because of the carbon. I took 'em out of the engine and tried to loosen them in a cup with WD40. But they were really stubborn. 
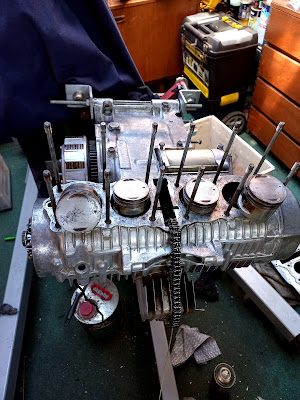
Engine case with old pistons Honda CB500K1 1972

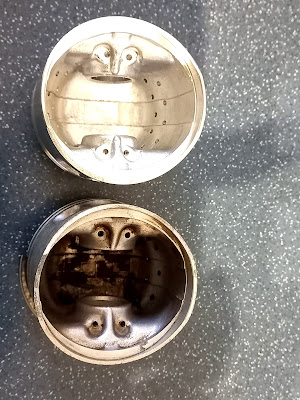
Old pistons with rings stuck in ringlands Honda CB500K1 1972
Old pistons with rings stuck in ringlands

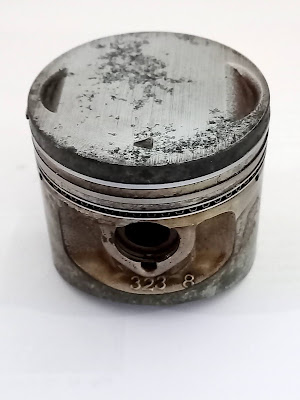
Pitted original piston Honda CB500K1 1972
Pitted original "Honda 323" piston


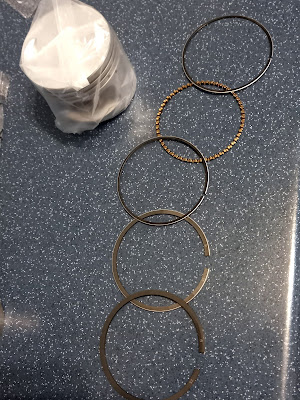
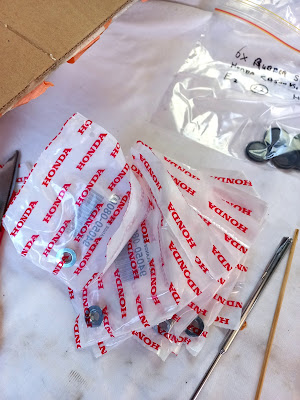
All in all I decided to get new 0.25 oversize pistons and rings. Original Honda ones are very expensive but 4into1.com sells a nice set for under a $100,-
The 4 piston set replaces Honda Part Numbers: 13102-323-405 (piston), 13021-323-014 (rings), 94601-15000 (clip) and 13111-440-000 (pin)

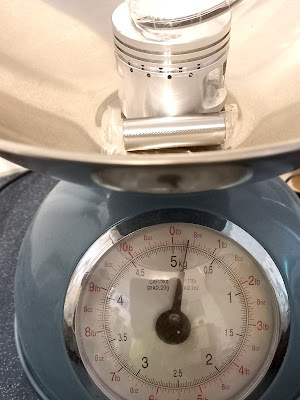
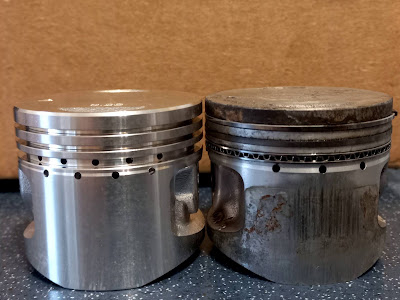
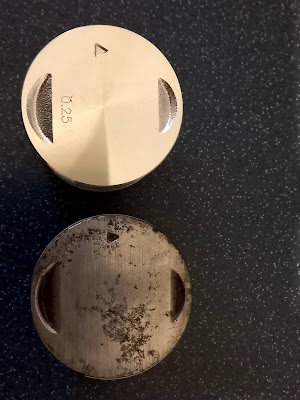
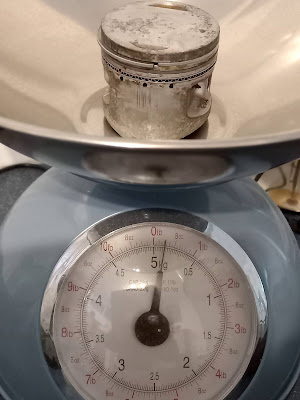
When I got them I compared the dimensions and weight of the new ones with the original old Honda ones and was pretty pleased with the results... Same overall and individual weight for the pistons, piston pins and rings. With a lot of cheap imitation pistons sets the weight differs from the originals, sometimes the piston pin is too heavy or the piston too light. The new ones have one extra oil hole below the rings and behind the scraper rings compared to the original ones. I can't say anything about the quality of the forged aluminium as you simply can't tell by looking at them how they were forged. 

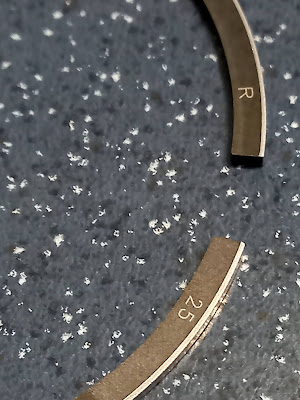
Make sure the Letter stamped on the top two rings are facing up when installing them and stagger the ring gaps according to the manual (90 degrees between each gap).

Ring order:
Top Compression Ring (silver outer rim)
Second Ring (black outer rim)
Bottom Rings (3 pieces - Spacer in the middle - 1 thin ring on either side)


Weight original piston Honda CB500K1 1972

Weight new piston Honda CB500K1 1972
Weight new piston

New piston with rings Honda CB500K1 1972
New piston with rings Honda CB500 four

New 0.25 oversize piston ring Honda CB500K1 1972
New 0.25 oversize piston ring Honda CB500 four

New and old piston Honda CB500 four

New and old piston Honda CB500 four

New and old piston Honda CB500 four
New and old piston Honda CB500K1 inside

Weight old piston Honda CB500 four

Weight new piston Honda CB500 four
Weight new piston Honda CB500 four  


I took the head, new pistons and cylinder to Sam at Chris Milton engines for an engine bath, vapor blast, rebore, hone, head skim and valve lapping. They also removed the bent valve without damaging the valve guide.

0.25 oversize bore and hone Cylinder Honda CB500K1

honed surface Cylinder Honda CB500K1

Some Maths

I was curious what the new engine capacity would be with the 0.25 oversize pistons.
The formula to calculate the capacity of an engine:

Capacity (in cc)  =  (Ï€/4 x bore² x stroke x # cylinders)/1000   (note: Ï€ ≈ 3.14)
Original engine: (3.14/4 x 56.0² x 50.6 x 4)/1000    498.2 cc
Rebuild engine with 0.25mm oversize pistons:
 (3.14/4 x 56.25² x 50.6 x 4)/1000    502.7 cc
An increase of 4.5 cc !


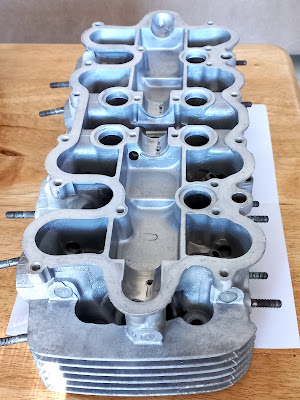
skimmed and vapor blasted Cylinder head Honda CB500K1
Skimmed and vapor blasted Cylinder head Honda CB500K1

fresh cut valve seats Cylinder head Honda CB500K1
freshly cut valve seats Cylinder head Honda CB500K1

Cylinder head Honda CB500K1

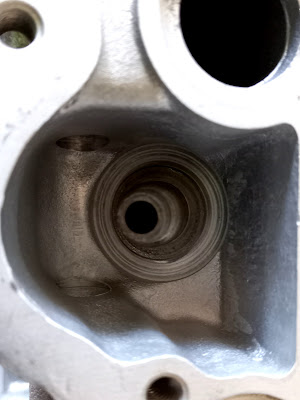
Valve guide inside Cylinder head Honda CB500K1

Cylinder head Honda CB500K1

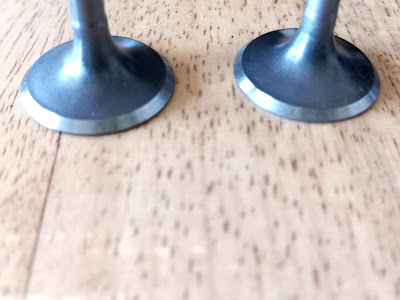
Lapped valves Honda CB500K1
Lapped valves

Lapped valves Honda CB500K1
Lapped valves


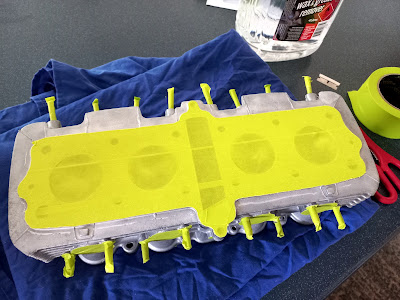
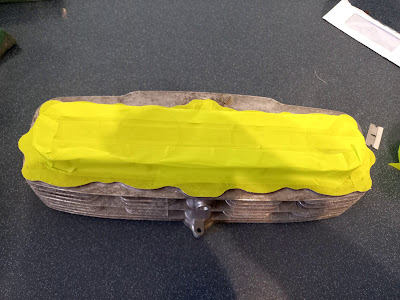
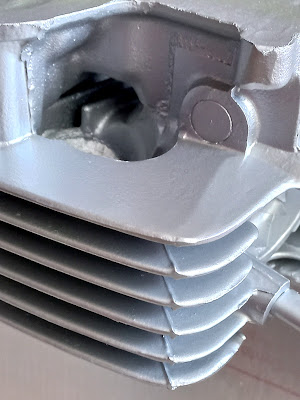
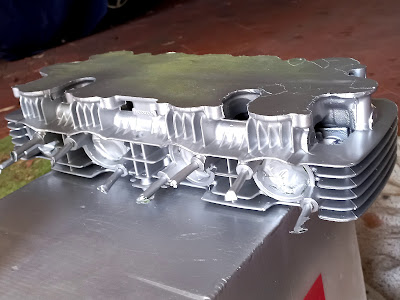
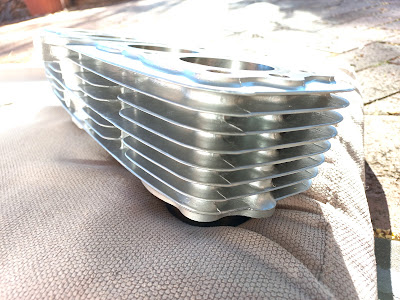
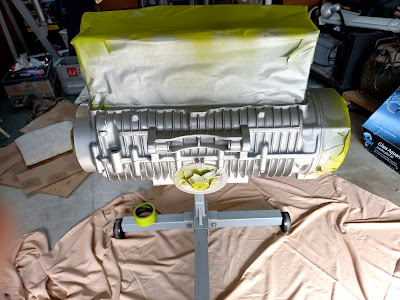
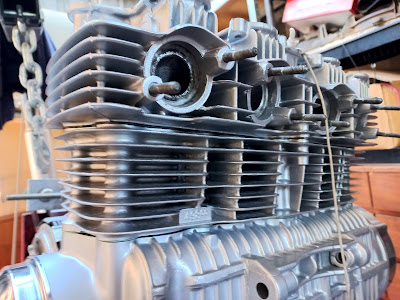
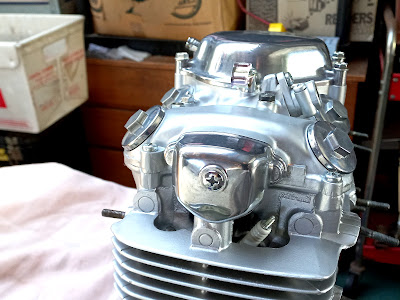
After I picked everything up I painted the head cover, head and barrel with 3 coats of Dupli color D1615 aluminium engine paint with ceramic. This colour is almost an exact match with the original factory colour.
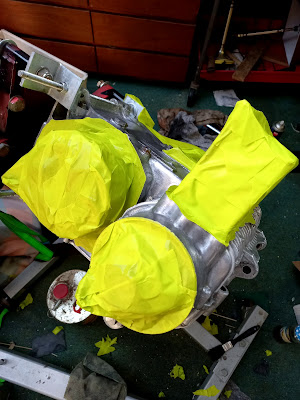
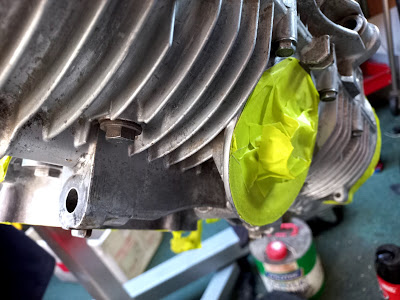
A good trick to get sharp masking tape edges is to rub the overhanging tape with a piece of metal like a spoon, it will cut the tape on the sharp edge and you can peel of the excess no worries.
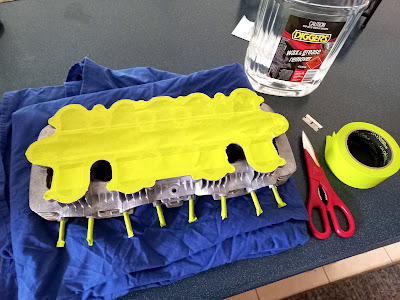
Painting engine Honda CB500K11972
Painting engine Honda CB500K 1972

Painting engine Honda CB500K11972
Painting engine Honda CB500

Painting engine Honda CB500K11972
Painting engine barrels

Painting engine Honda CB500K11972
Painted engine head

Painting engine Honda with Dupli color D1615
Painted engine Honda with Dupli color D1615

Painted engine Honda with Dupli color D1615
A bit more now with the 0.25 oversize pistons

Painted engine Honda with Dupli color D1615
Painted engine Head

Painted engine Honda with Dupli color D1615
Painted engine barrels

Painted engine Honda with Dupli color D1615
Painted engine barrels Honda with Dupli color D1615


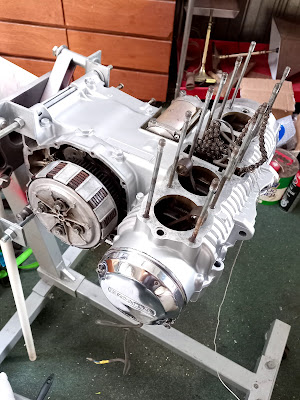
Before I painted the engine case it took me at least 15 hours of cleaning all the little corners with bamboo skewers, old socks, thinner, steelwool and wax and grease remover. I tried to only use wooden tools to remove grease and dirt so I wouldn't damage the soft aluminium. After that I sanded everything with grit 240 and 400 which is rough enough to give the paint something to bite in but smooth enough to give it an nice finish   I'm happy with the results and hopefully the paint will stay on the engine for a long time and won't "yellow" (never  use clearcoat because that will yellow for sure...)
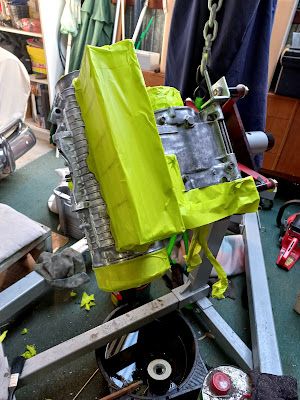
Painting engine case Honda with Dupli color D1615
Painting engine case Honda

Painting engine case Honda with Dupli color D1615
Painting engine case HondaCB500K1

Painting engine case Honda CB500 with Dupli color D1615
Painting engine case Honda CB500

Painting engine case Honda with Dupli color D1615

Painting engine case Honda with Dupli color D1615
Painted engine case Honda with Dupli color D1615

Painted engine case Honda with Dupli color D1615
Painted engine case Honda

Painted engine case Honda with Dupli color D1615
Painted engine case Honda CB500K1

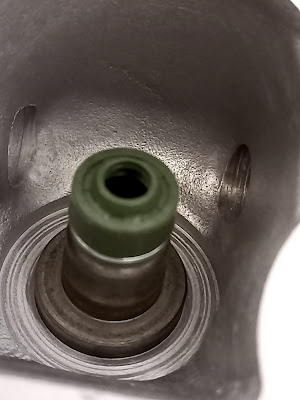
 When I installed the new valve guide seals that came with the gasket set I noticed they were of poor quality, too soft, floppy and the tiny springs almost fell of without touching them, One of them even ripped while trying to install it. Luckily 4into1 sells also better quality ones for 1.50 each. Make sure you order them even when you buy the gasket set. The new ones were installed in seconds, they popped in place straight away.

new valve seals Honda CB500 four
new valve seals crappy brown ones and better green ones

new valve seals Honda CB500 four
new valve seals Honda CB400F, fits various models

new valve seals Honda CB500 four

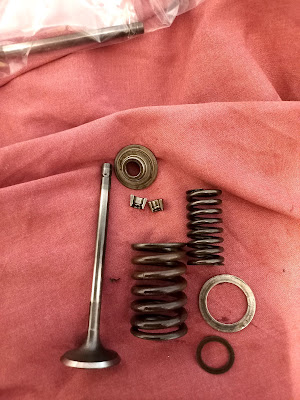
Valve, springs, spring seats and collets

The Honda CB500K1 has dubble valve (coil) springs which allow extremely high RPM without valve float. It makes it a bit harder to install the valve collets (talking from experience..)
The two "washers" are the seats for the valve springs and go between the head and springs.
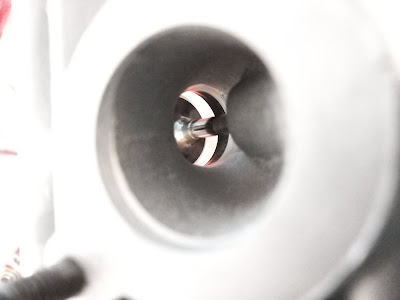

Sliding the valve into the valve guide

Sliding the valve into the valve guide  trough the valve seal
Valve stem, spring seats and seal

Valve stem seal
Valve stem seal installed on valve guide

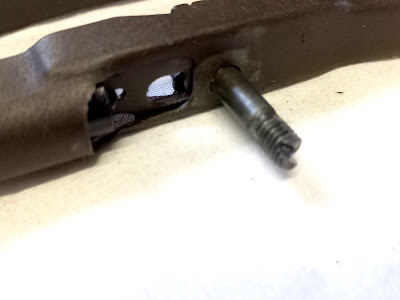
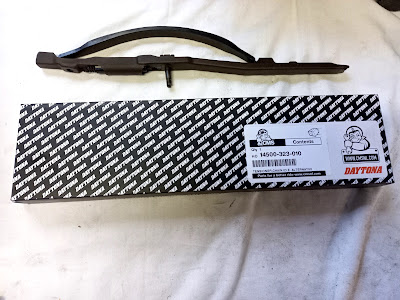
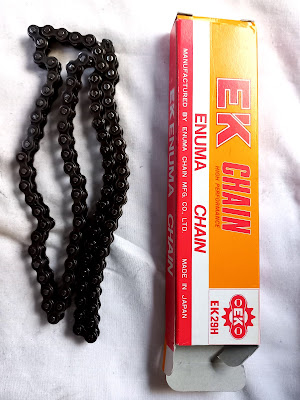
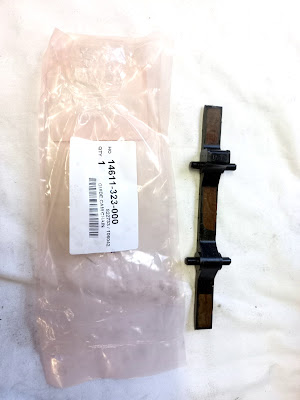
As the cam chain tensioner was damaged (half of the adjusting screw had snapped off) I wanted to replace it and just out of precaution I decided to also replace the cam chain with a new one (Made in Japan - Brand: Enuma). And while there it made sense to me to also replace the cam chain guide, which can wear out and isn't too expensive to replace.
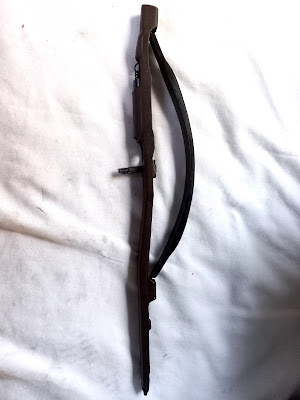

Old cam chain tensioner Honda CB500K1 1972

Old cam chain tensioner Honda CB500K1 1972
Broken screw cam chain tensioner Honda CB500K1 1972

New cam chain tensioner Honda CB500K1 1972
New cam chain tensioner CMSNL Honda CB500 four

 
Cam chain Honda CB500K1 1972
Cam chain Enuma Honda CB500K1 1972

So on a Saturday afternoon two mates from work rocked up to help with changing the cam chain (Roger has a special tool to do this) and putting the barrels back on the pistons.
In exchange there was a reward after the job in the form of beer and popcorn (to be honest the first couple of beers were consumed before we even started the job ;).

First thing  to do was replacing the cam chain, followed by fitting the new pistons. Make sure you cover the openings underneath the pistons with a rag so nothing can fall into the engine while installing the pistons.
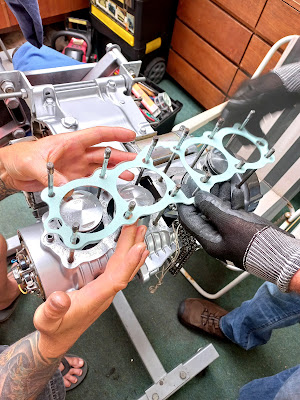
And now it was time for the fiddly job of slipping the pistons into the barrels. With six hands it was done in a couple of minutes and everything moved nice and smooth.

Installing the new cam chain Honda CB500 four
Installing the new Enuma cam chain Honda CB500 four

Installing the new pistons Honda CB500K1
Installing the new 0.25 pistons Honda CB500K1

Installing the new pistons Honda CB500K1
Preparing the new pistons, beer in the background

Fitting the engine case/barrel gasket

The engine case/barrel gasket should go on with the printed side faced up. In the pic it's upside down ;)
Don't forget to install the 4 new O-rings around the bottom of the cylinders and the 2 that go around the oil valves (oil control orifice) on the left and right side of the engine case.


Barrels installed Honda CB500K1

Barrels installed Honda CB500K1

New cam chain guide Honda CB500 four
Cam chain guide Honda CB500 four

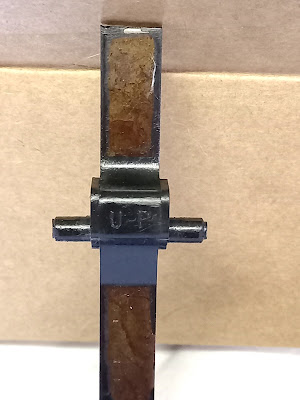
Old cam chain guide  "UP" mark Honda CB500 four
Old cam chain guide "UP" mark Honda CB500 four

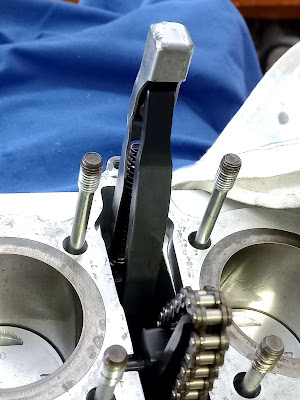
Cam chain, tensioner and guide installed Honda CB500K1
Cam chain, tensioner and guide installed

Cam chain tensioner adjusting screw Honda CB500K1


Honda CB750K4 1974 Shaine
Bonus pic of Shaine's Honda CB750K4 1974

It all took a bit longer than expected so we didn't put the head back on and I decided to finish it later on. The next day I got everything ready, put the new head gasket and two little O-rings in place, almost fitted the dowels (also called "knock pins") but ... Grrrr one of the dowels was slightly deformed (invisible with the naked eye..) during the disassembly and didn't wanna go into the barrel nor into the head with one side. I tried to tap it back in it's original shape but it didn't work and it actually streched the metal.

You really need those dowels to line the barrel and head up for an exact fit. So I ordered some new ones but it took around 2 weeks to get them. 

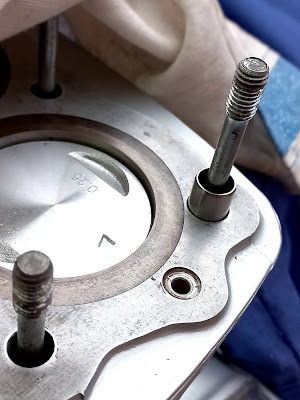
So this morning I got up early while it was still nice and cool in the shed and fitted the head. Before I fitted the head over the studs I made sure each new nut travelled smoothly over the stud. After that I fitted the new gasket, new knock pins and two little O-rings over the oil passages and carefully lowered the head over the studs onto the barrel.

New head dowels Honda CB500K1
New head dowels

New head dowels Honda CB500K1
Hew dowels Honda CB500K1

New head dowels Honda CB500K1

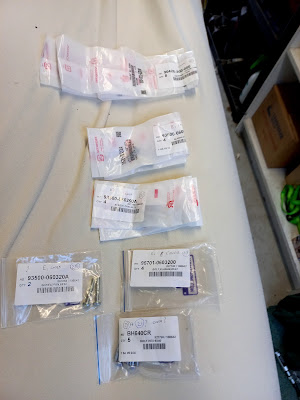
New stud flange bolts Honda CB500K1

Fitting cylinder head Honda CB500K1

Fitting cylinder head Honda CB500K11972
Fitting cylinder head Honda CB500K1
 

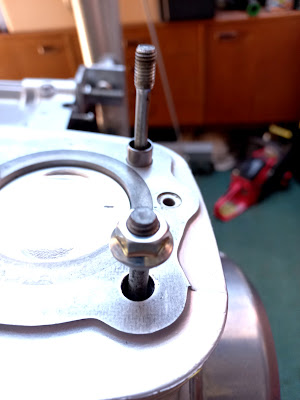
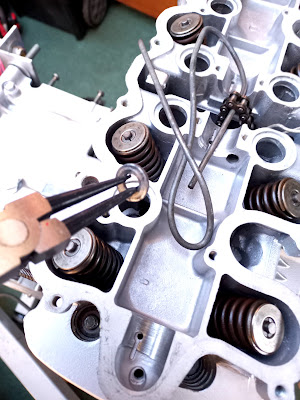
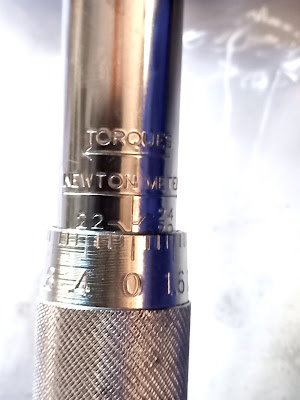
Next I grabbed the thick washers with a circlip plier and fitted them on the studs. Make sure the flat side faces towards the head. The edge of the topside of the washer is a bit more rounded and it's easy to feel the difference. The new nuts were installed with the help of a magnet and torqued down to 22 Nm (16 foot pound) in the sequence shown in the pic below.


Torque sequence Cylinder head Honda CB500 K1 1972

Fitting the cylinder head washers Honda CB500 K1 1972
Fitting the cylinder head washers

 
Torque value 22Nm for the cylinder head nuts Honda Cb500 four


New cylinder head nuts Honda Cb500 four

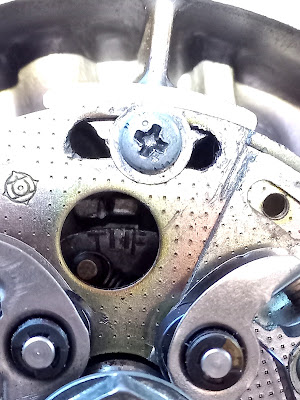
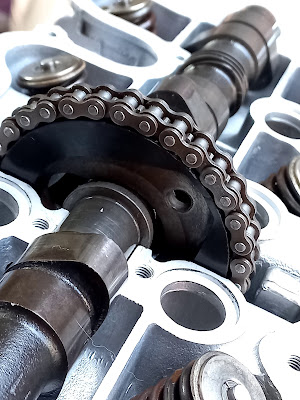
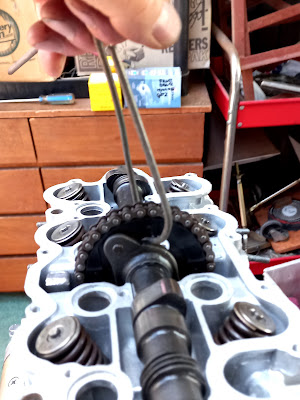
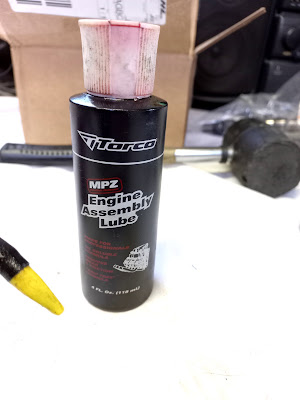
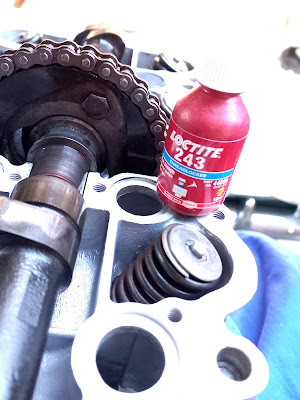
Next step was fitting the cam underneath the cam chain and camchain over the sprocket.  Before putting the cam into it's right spot I applied some assembly lube on both mating sides of head and cam. Before you can fit the cam sprocket over the cam you have to adjust the valve timing. Rotate the crankshaft in clockwise direction and align the T (1,4) mark to the timing mark on the case. Now make sure them notch on the outer right side of the camshaft is aligned with the head surface (see pics below). It was a bit of a struggle to get the sprocket with camchain back on the cam but with a thick piece of wire I managed to pull it high enough so I could  carefully tap it back in place with a rubber mallet. Everything moves smoothly, the only worry I had is that the cam chain appears to be very tight. It's a new camchain as mentioned earlier (Enuma EK29H) so I kind of expected a tighter fit. The cam sprocket bolts were torqued down to 16Nm and secured with a drop of Loctite 243.
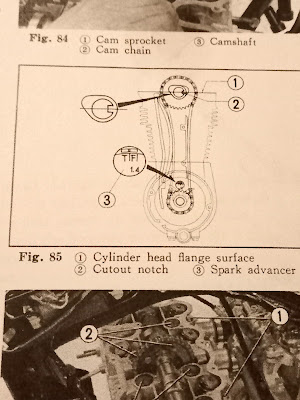
 

Cam chain Honda CB500 K1

Setting the correct valve timing Honda CB500K1

Setting the correct valve timing Honda CB500K1
Setting the correct valve timing

Setting the correct valve timing Honda CB500K1
Setting the correct valve timing Honda CB500

Lifting the cam chain over the cam sprocket

New Enuma cam chain Honda CB500K1

 
Assembly lube
Assembly lube


Cam sprocket bolts with Loctite 243
Cam sprocket bolts secured with Loctite 243

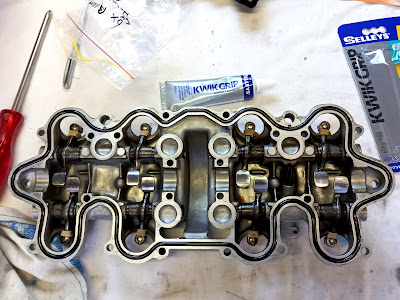
The last step was putting the cam cover back on the head, There're a lot of bolts and screws involved. To minimalise the risk of bending tappets I used rubber bands while installing the cover. Unfortunately I don't have a pic of it but basically you connect opposite tappets by a rubber band so they stay as far away from the valve stems as possible.
To keep the rubber gasket in place during installation I used a couple of drops of clear glue.

New bolts and tappet covers Honda CB500 four

New bolts head cover Honda CB500 four
New bolts head cover

New gasket head cover Honda CB500 four

Fitting the cam cover Honda CB500K1

Fitting the cam cover Honda CB500K1
Fitting the cam cover

I started with the middle four flanged bolts, just put them in, then working my way to the outside of the cover. Just hand tight them before you torque them down to specs.

I also cleaned the oil strainer, you can just pull it out after removing the oil pan.

Cleaned oil strainer Honda CB500K1

Oil pan Honda CB500K1
Oil pan with new gasket fitted

Last bit was bolting down the breather cover with some new bolts and screws, replacing some oil seals and adjust the valve clearance to spec (0.05mm inlet and 0.08mm for the outlet valves), easy job.
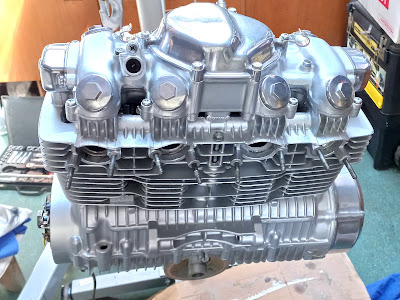
Breather cover Honda CB500K1

Engine Honda CB500K1

Feeler gauge for Honda fours

Engine Honda CB500K1 1972

 
New oil seals for tacho drive Honda CB500K1
New oil seals for tacho gear Honda CB500K1

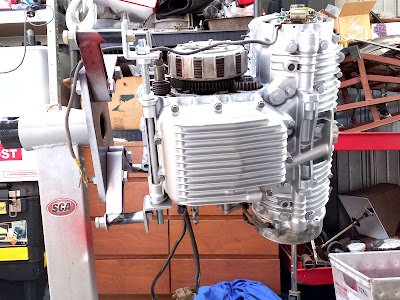
 Ok, what the heck, let's fit the engine back in the frame.as well.
The method I used was putting the engine on the right side and drop the frame over it.
It's easier to do this with two people but you can do it alone if you want.
Shaine had done this before with his old BMW bike and said it was the best and easiest way to do it.
So Shaine rocked up again and was followed by Lorrie who was touring around in the neighbourhood on his new Kwaka Z900 ..

Nice bikes

The first step was taking the engine of the engine stand, easy job with 3 people. Next we wrapped bits of the freshly painted frame in bubble wrap and before we knew it the frame was lowered over the engine. We connected engine and frame with the bolts, hangers and nuts losely installed and lifted the lot on a heavy duty dolly normally used for my old welder.
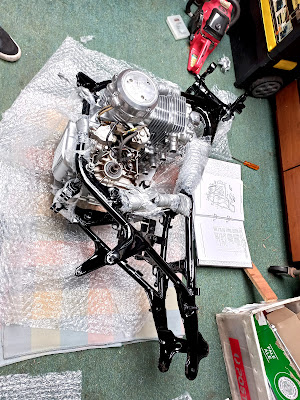
Frame wrapped in bubble wrap

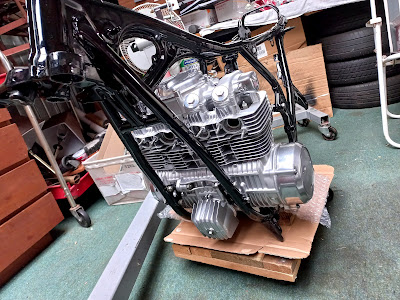
Engine mated with frame Honda CB500K1

Engine mated with frame Honda CB500 four
Time for some beers

Engine mated with frame Honda CB500K1
On the dolly

Engine mated with frame Honda CB500K1
Nice

There you have it, the assembly can begin :)